Setting Up an Azure Pipeline for ASP.NET ZERO Core MVC
In this tutorial, we will see how to create an Azure CI/CD pipeline for a fresh copy of ASP.NET Zero MVC Core project, hosted on GitHub. At the end of the tutorial we’ll be ready to deploy our web project to Azure App Service by just clicking a button. First of all create a demo project from aspnetzero.com and add the project to your private GitHub. For this sample, we will create a project named as MyPortalDemo (MVC Core project).
What's Azure Pipelines?
Azure Pipelines let us to create different jobs which automates CI/CD processes. There are plenty of predefined tasks by Microsoft and by third party vendors. It helps you to continuously build, test and deploy to any platform and cloud. See https://azure.microsoft.com/en-us/services/devops/pipelines/
Prerequisites
Before the deployment process through your project's pipeline, Azure App Service and Azure SQL Database must be ready. If they are not ready yet, you need to create them by following the instructions below:
Create a new Azure SQL Database
Creating an Azure Web App Service
To create a new Azure Web App Service, visit the Azure Portal and follow the instructions.
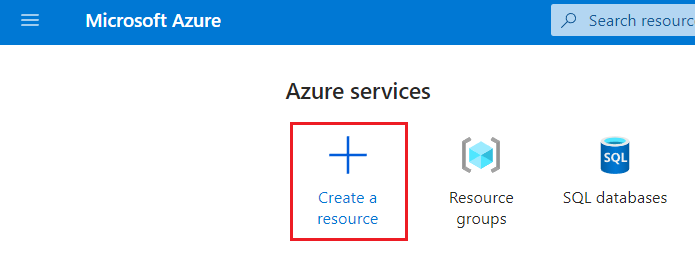
After signing in to your Azure account, you can directly create a Web App by clicking the Create Resource button.
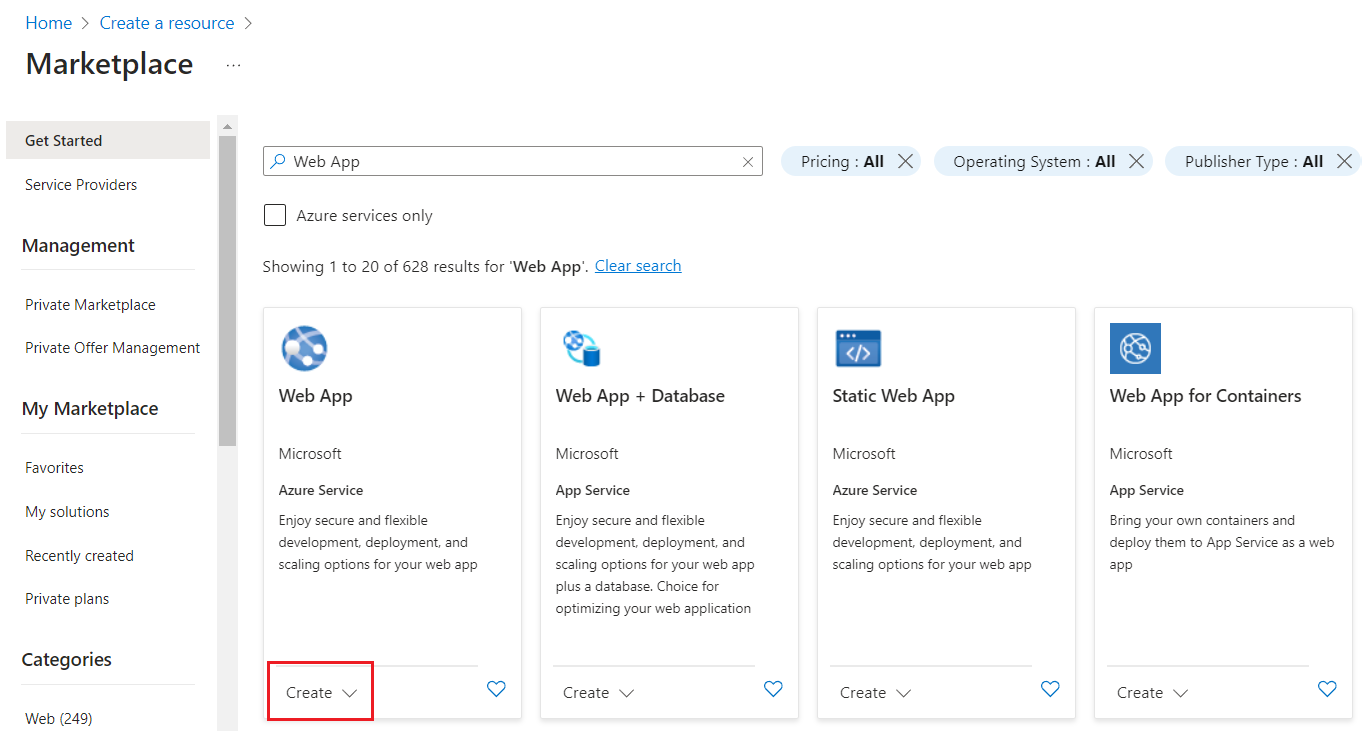
Entering Web App in the search bar, click the Create button as indicated below.
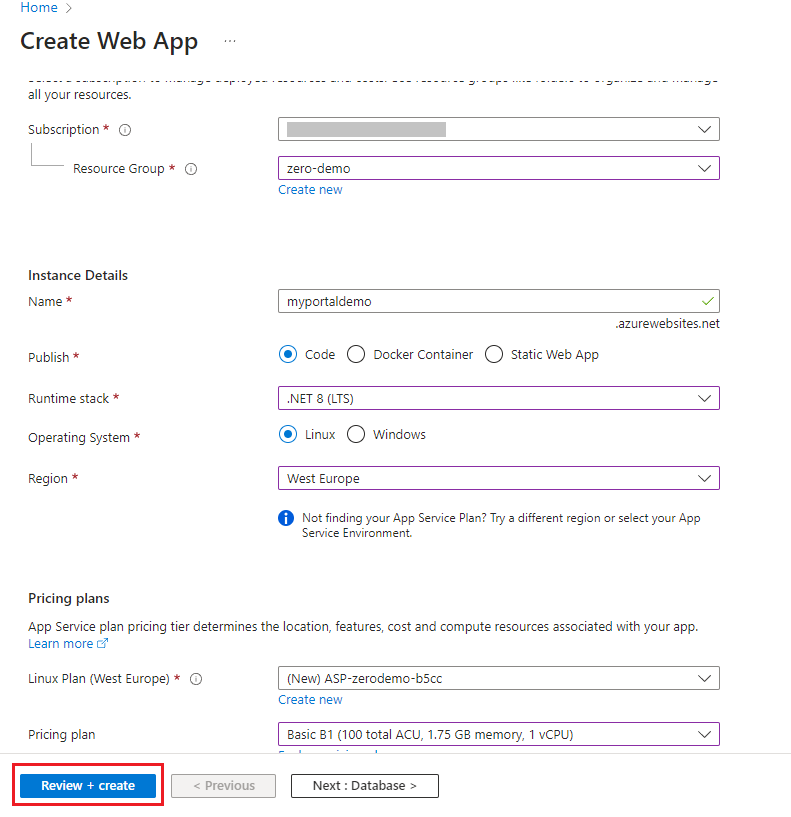
After filling in the required fields, click on the Review + Create button.
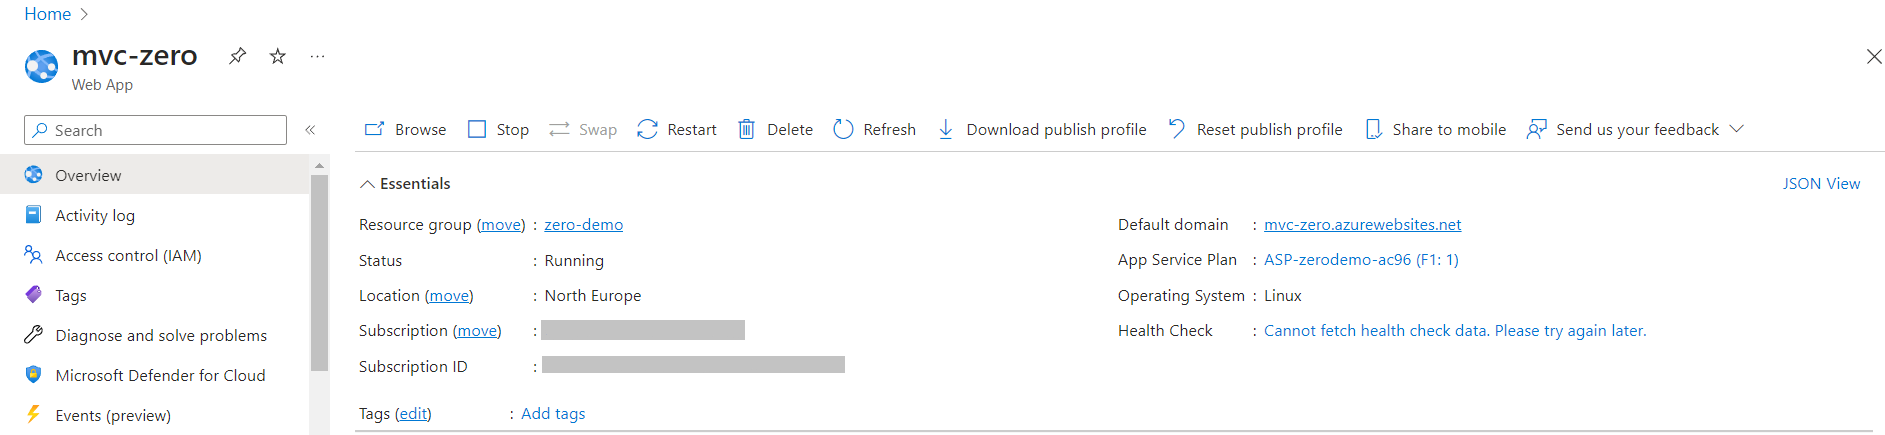
After creating the Web App service, you can find the information related to the service below.
Configuring ASP.NET Zero Project Settings
It is necessary to replace the "ConnectionString" values in your project with the SQL Server information created in the Azure portal. The "ConnectionString" is located in the appsettings.json file. You can change it as follows.
If there is a "ConnectionStrings" information in appsettings.Production.json while in the release environment, this information is used.
"ConnectionStrings": {
    "Default": "Server=tcp:yourserver.database.windows.net,1433;Initial Catalog=yourdatabase;Persist Security Info=False;User ID=yourusername;Password=yourpassword;MultipleActiveResultSets=False;Encrypt=True;TrustServerCertificate=False;Connection Timeout=30;"
}
Start Your New Azure Pipeline
Go to https://azure.microsoft.com/en-us/services/devops/pipelines/ and click the "Start free with Pipelines" button. You need to authenticate and grant permission for "Get started with Azure DevOps".
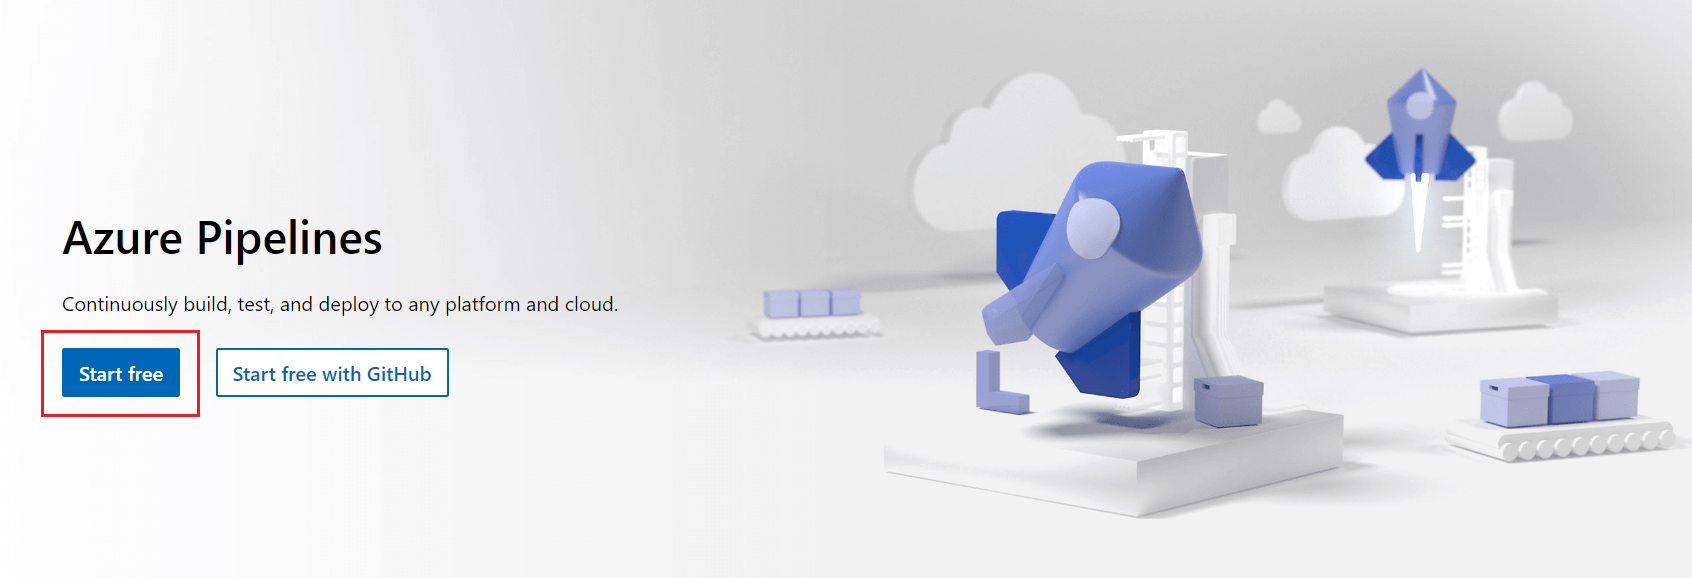
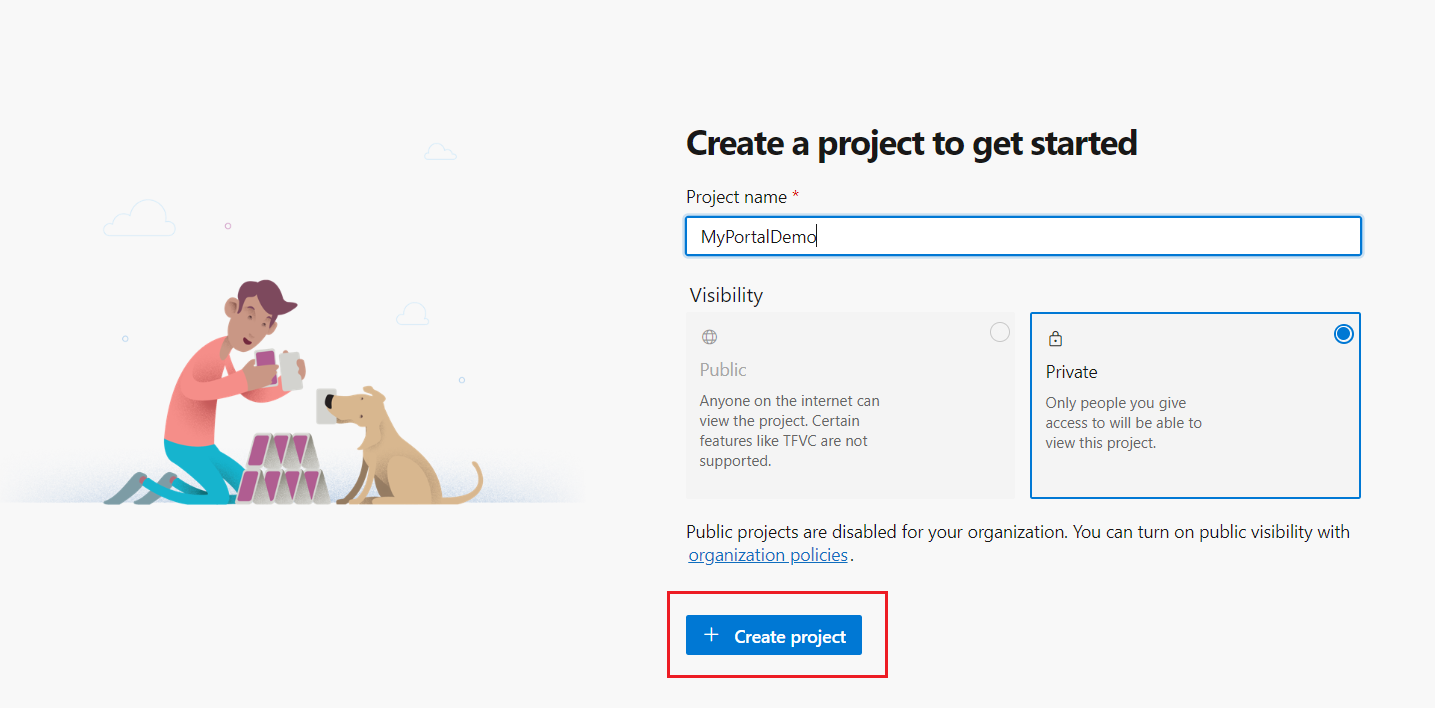
Create a project
After you authenticate, you will see the new project screen. Enter your project name MyPortalDemo.
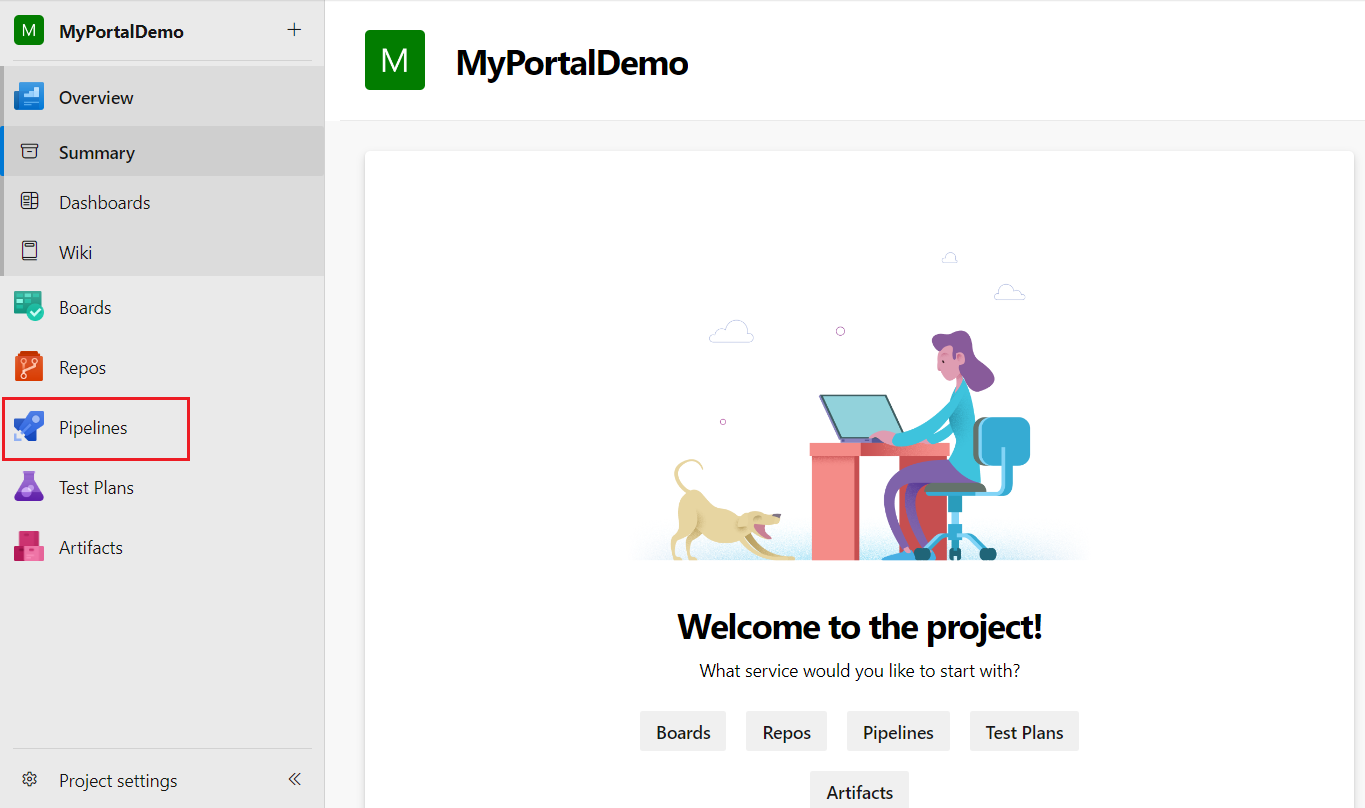
Select Your Pipeline Menu
After creating the project, select Pipelines from the menu on the left side. Once you've done that, click on the New Pipeline button.
Choose your source-code hosting service
Choose Github to create a pipeline with YAML.
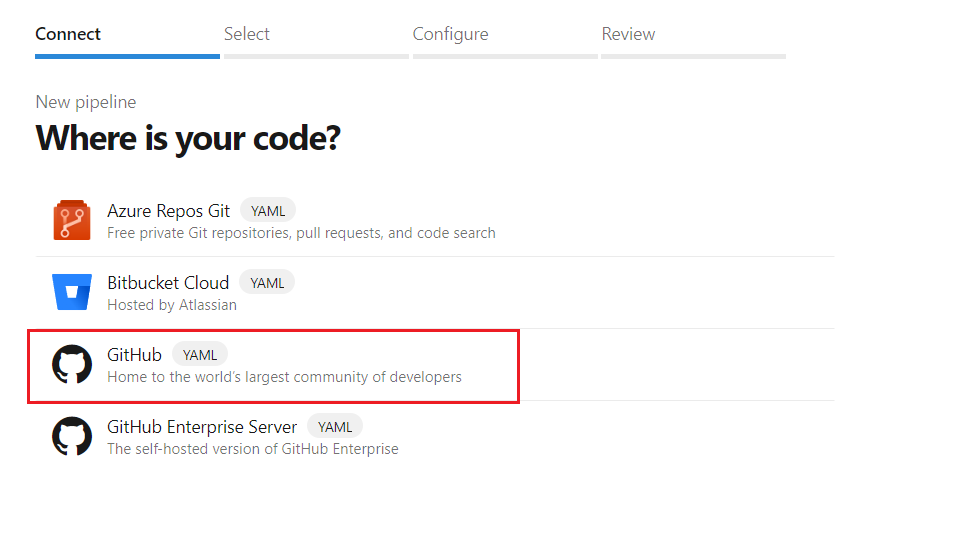
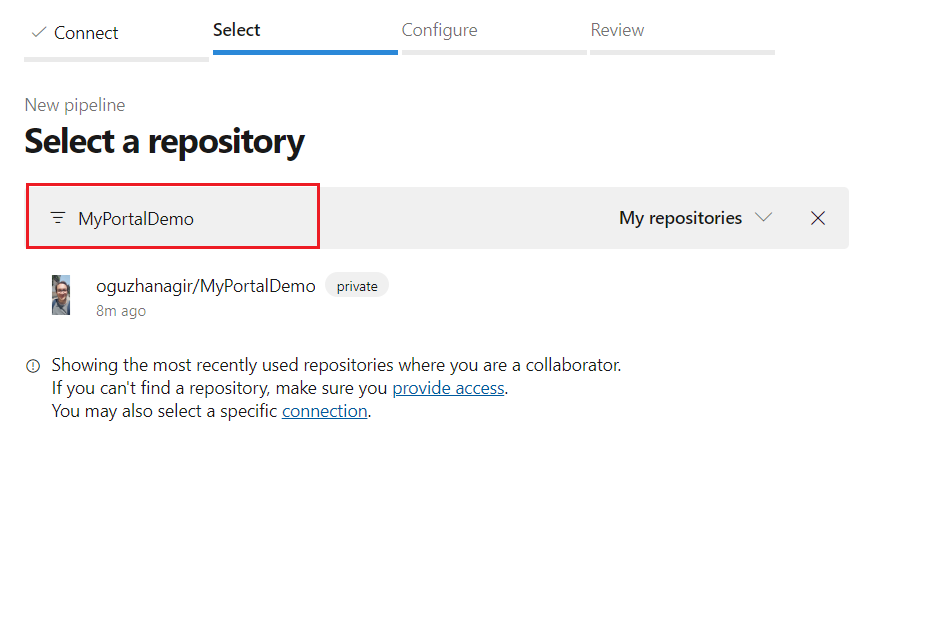
After that it will ask authorization to Azure Pipelines. After successful authorization, you will be redirected to your repository list. Select your repository for MyPortalDemo. If you have not committed your project to GitHub, you can do it now.
Then you will be able to see the list of your repositories on GitHub. Choose your repository.
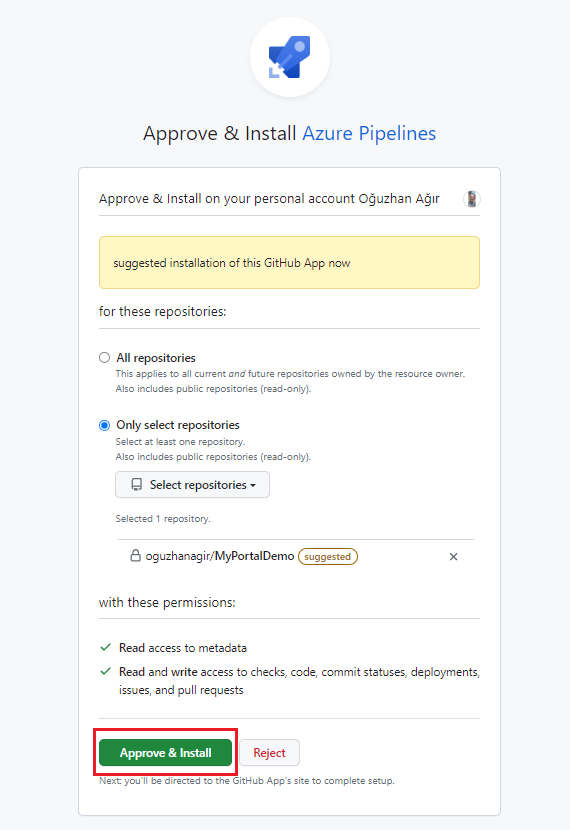
Grant permission to your repositories with OAuth.
Choose your template
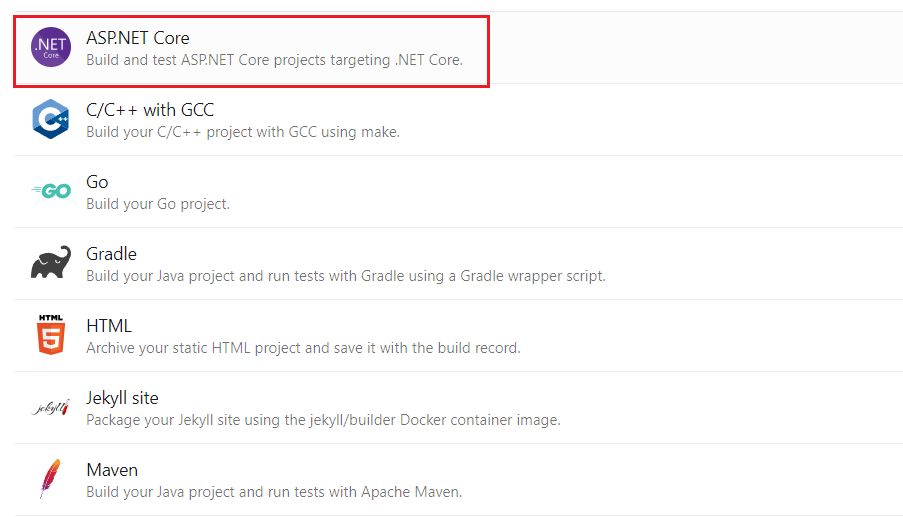
The next step is choosing a template... We will choose the ASP.NET Core template. After clicking on Show more look for the ASP.NET Core option and then click.
Configure your pipeline steps
After the template is being created, you will see the below auto-generated pipeline steps.
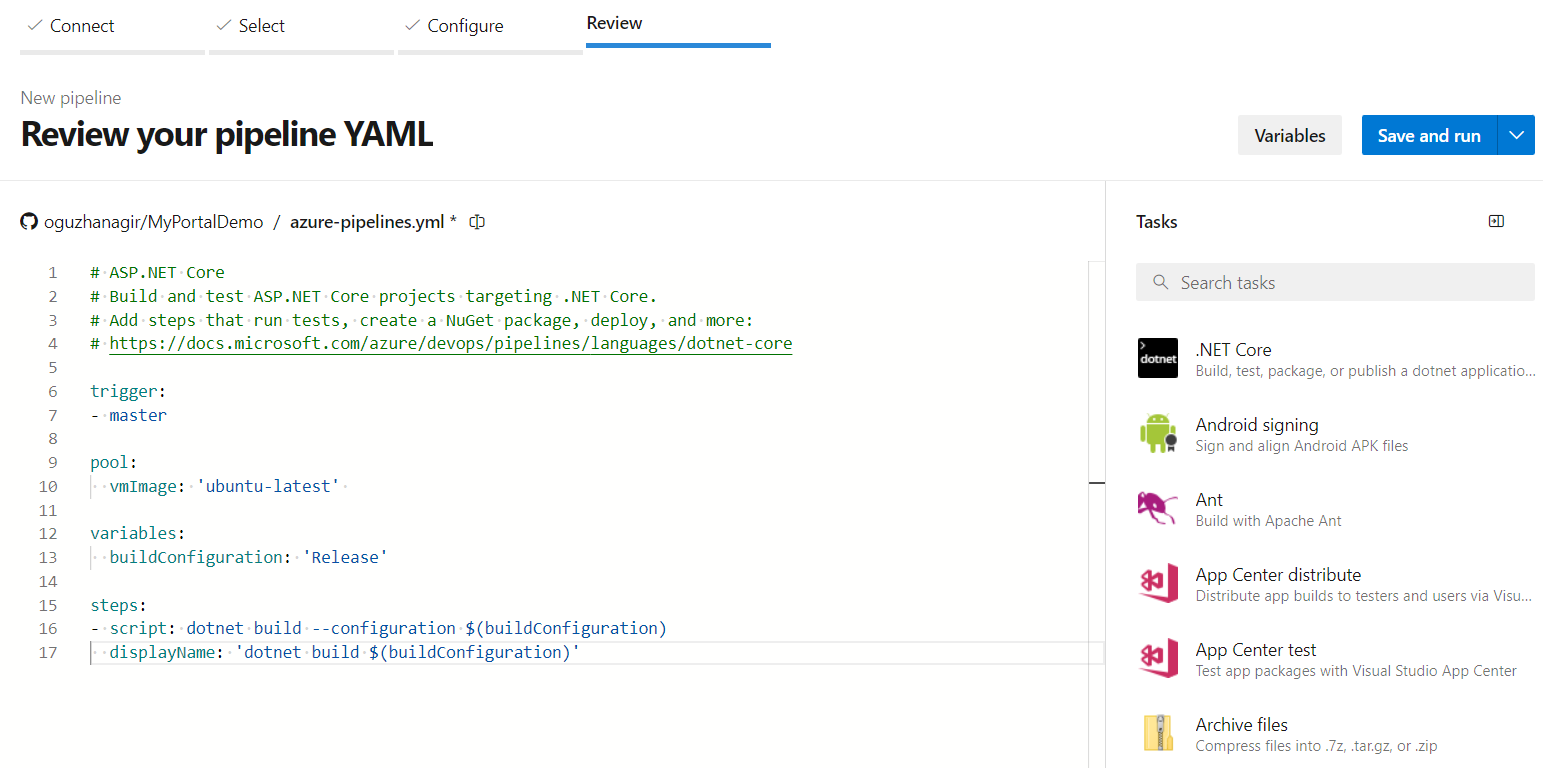
You can edit the default *.yaml file as specified below.
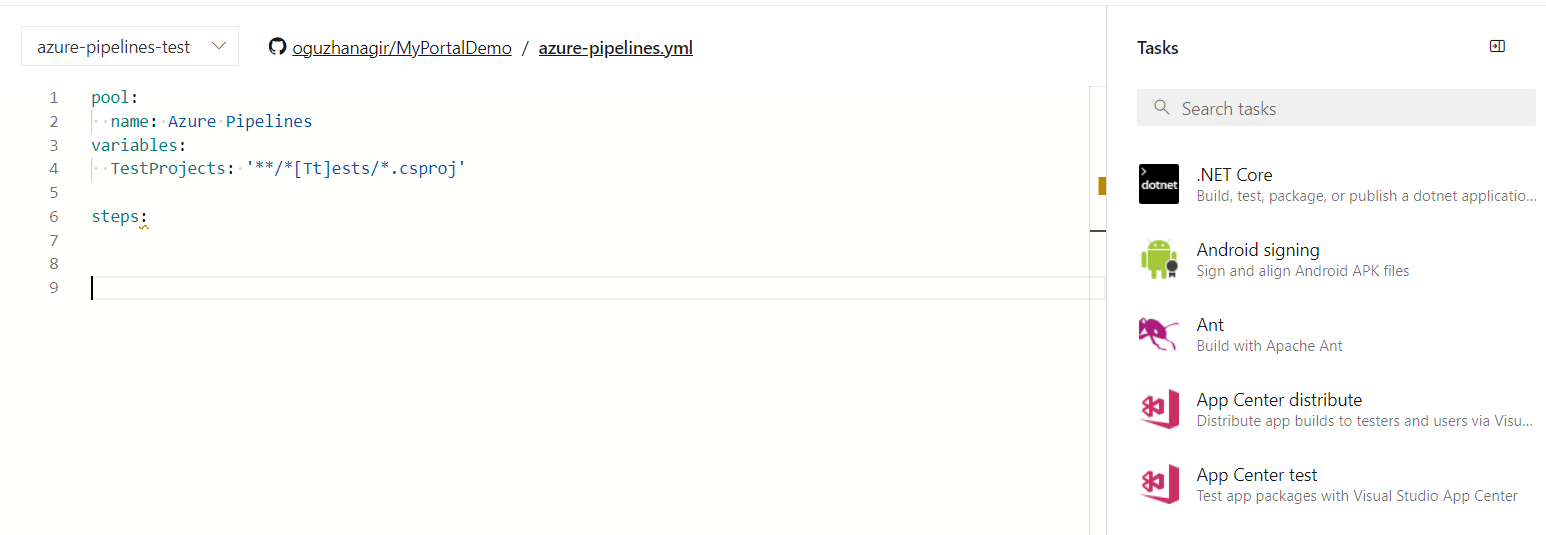
After specifying, you can add the indicated section under steps:.
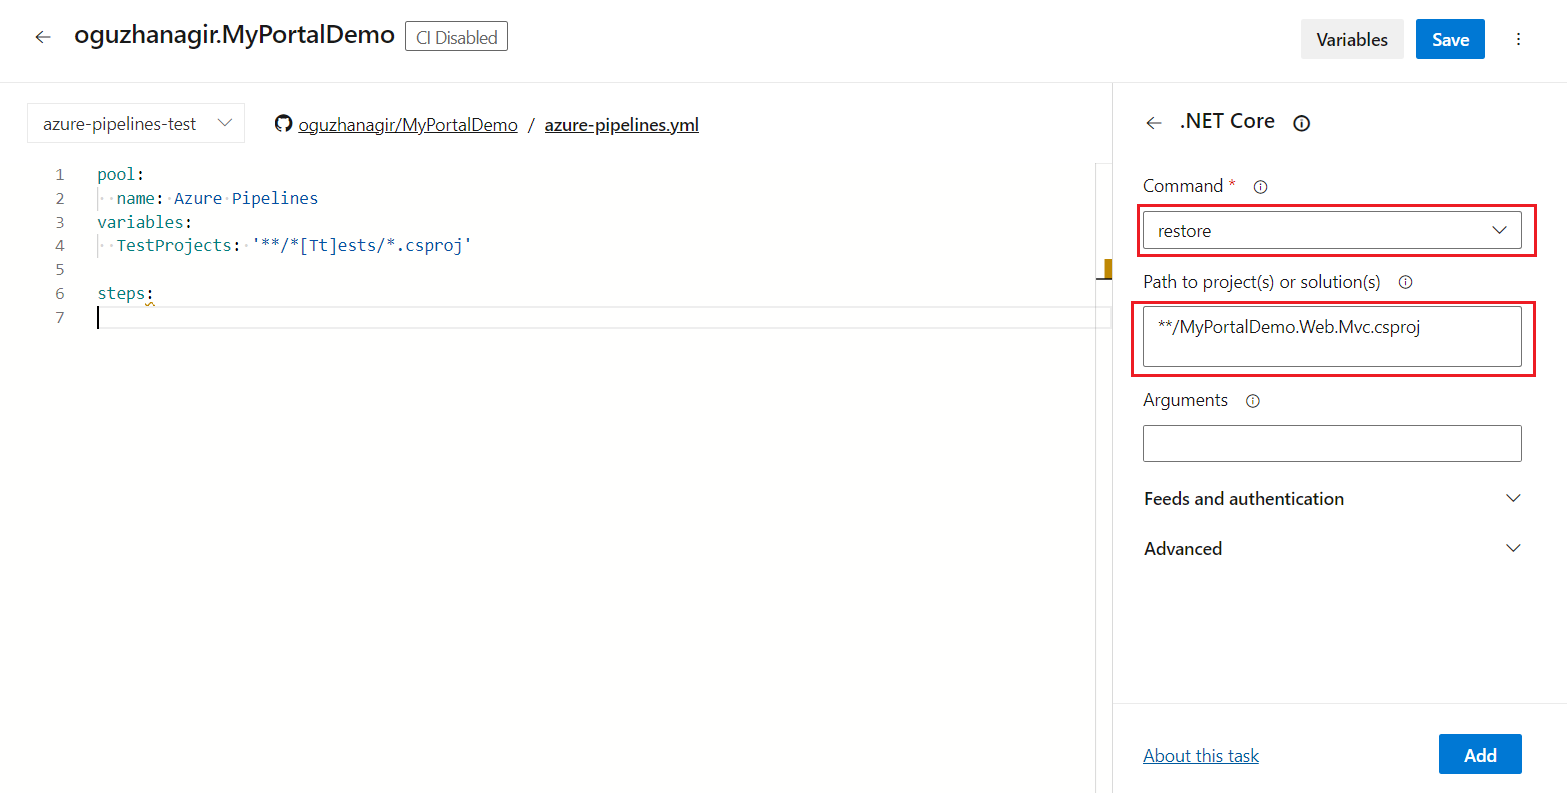
Other important setting is the Project(s) to build and restore. The default setting is **/*.csproj but this will break build process because Xamarin projects don't build with dotnet build command but need to be built with msbuild. So we need to build only the *.Web.Mvc project. For that, change it to **/MyPortalDemo.Web.Mvc.csproj as seen below.
Configure the Restore task as specified.
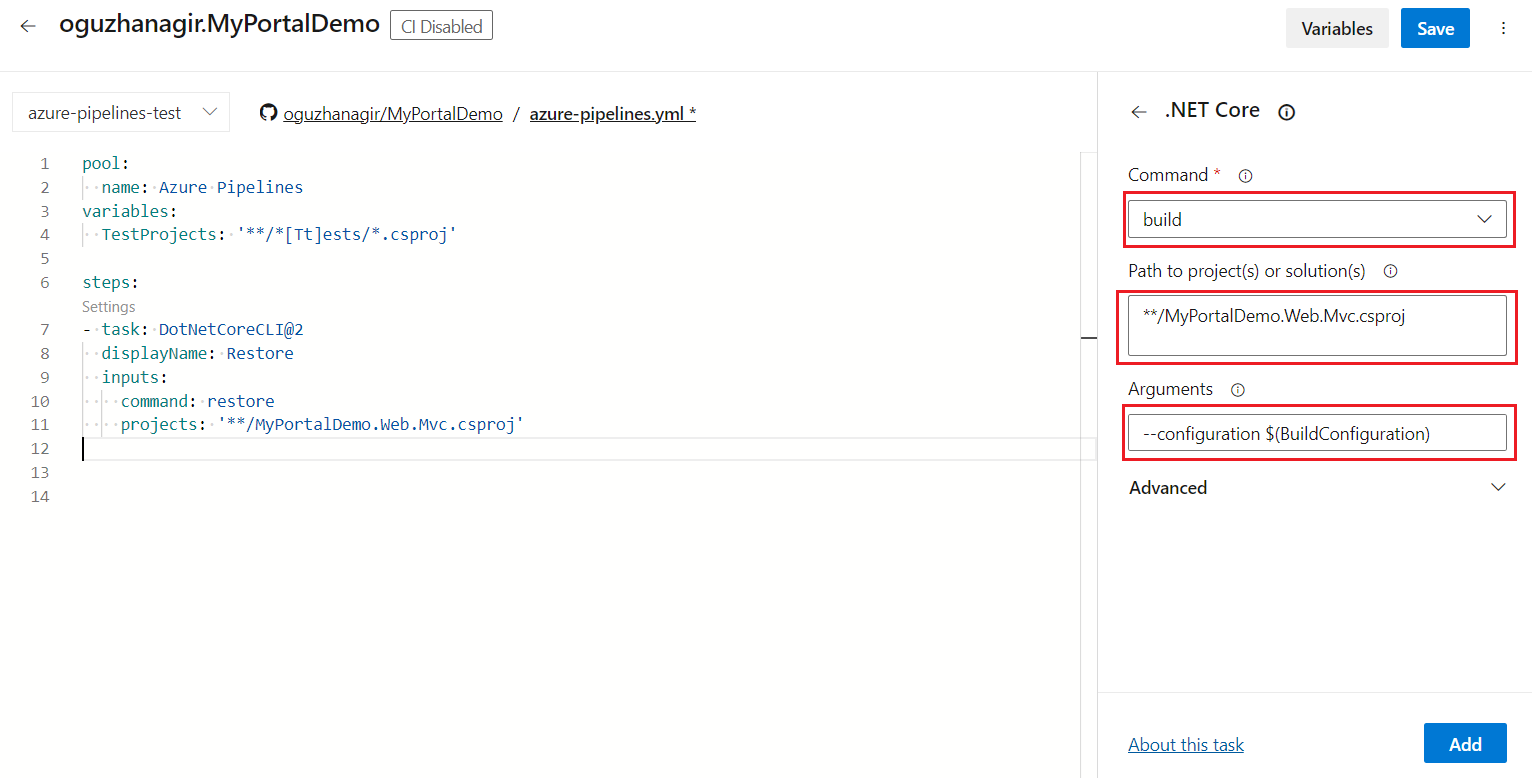
Configure the Build task as specified and add it as well.Additionally, here the --configuration $(BuildConfiguration) argument should be specified.
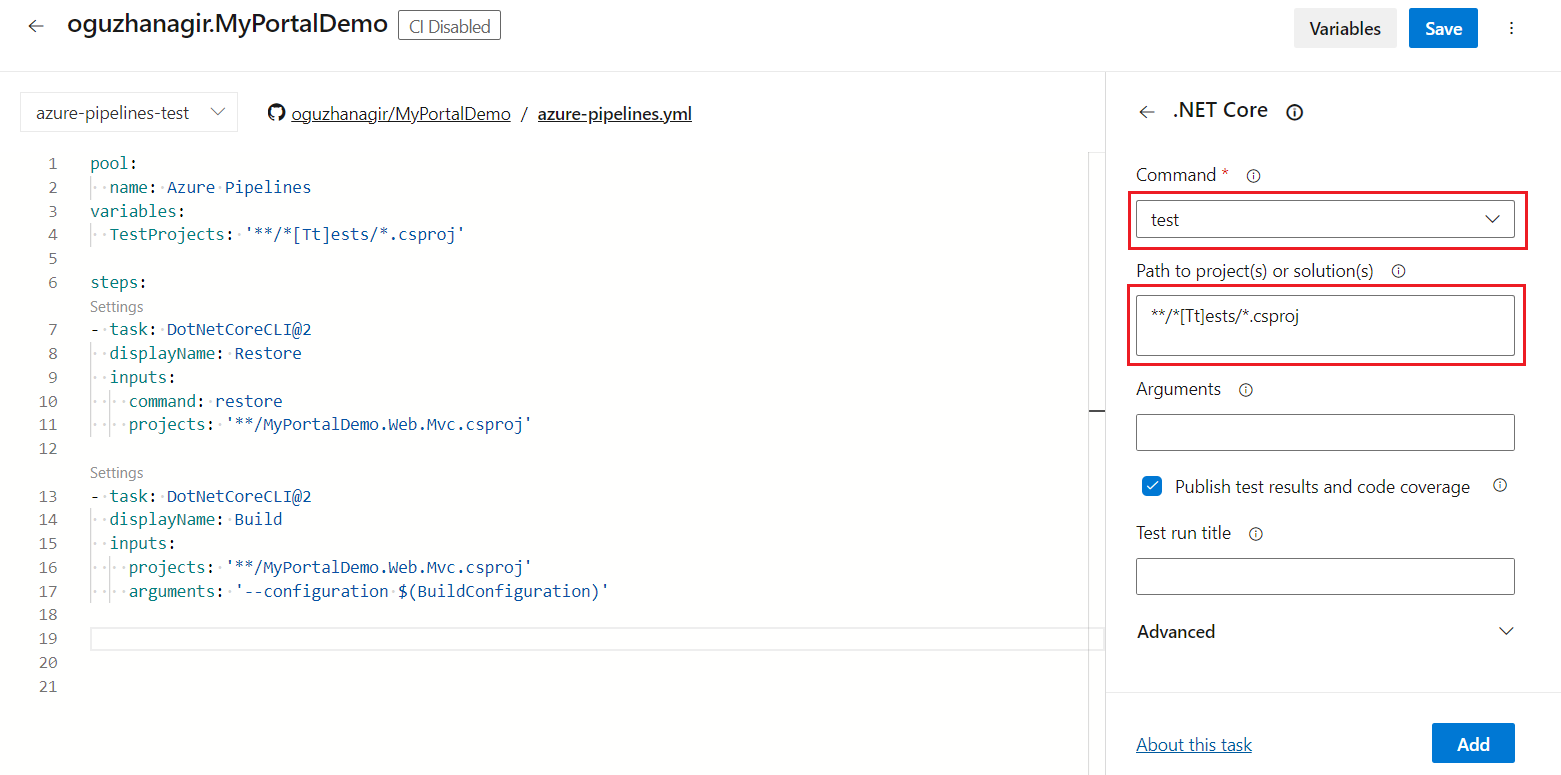
Add the path of the Test project by specifying it as **/[Tt]ests/.csproj.
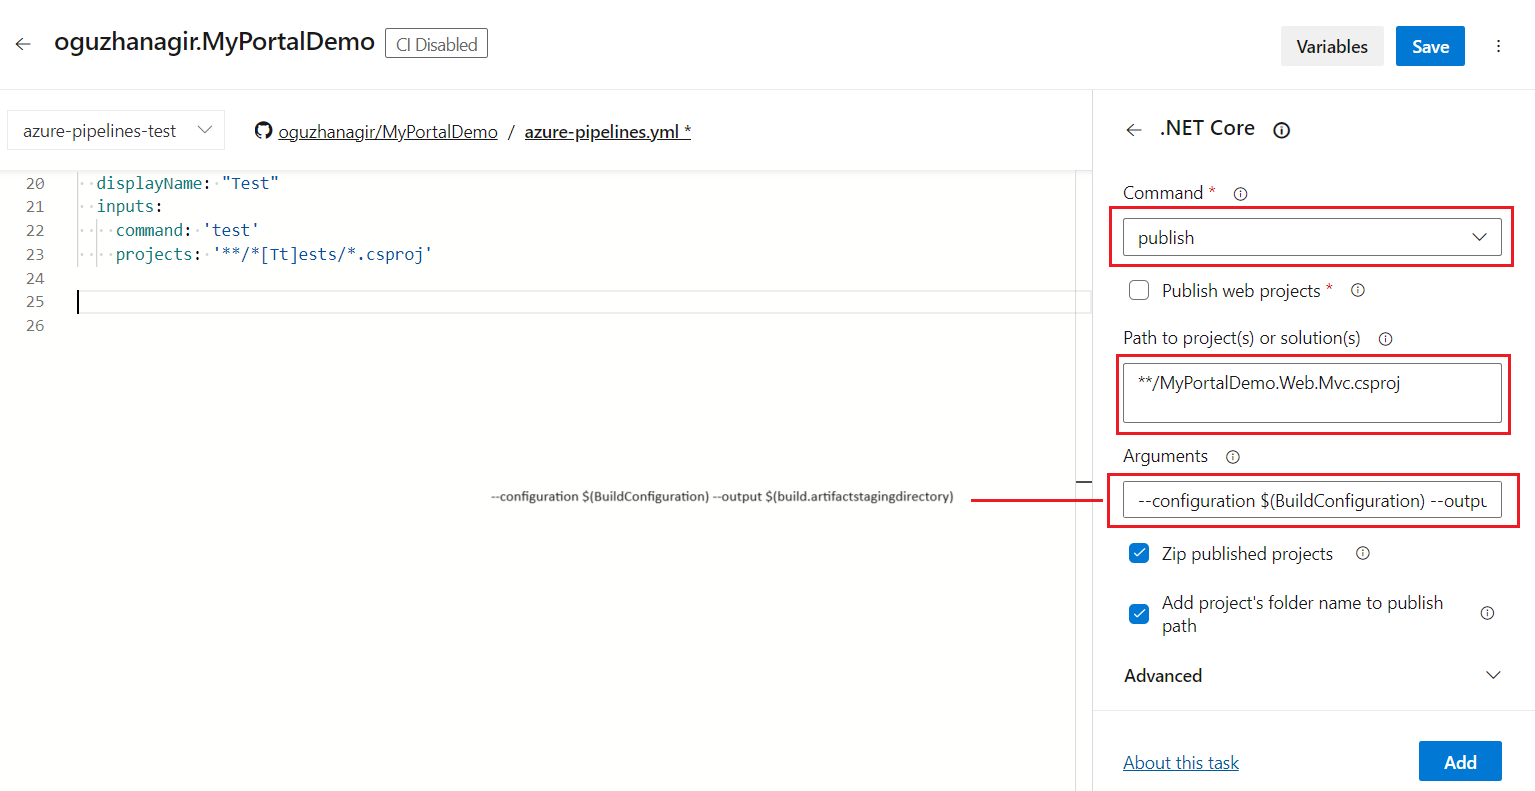
Add the path of the Publish project.
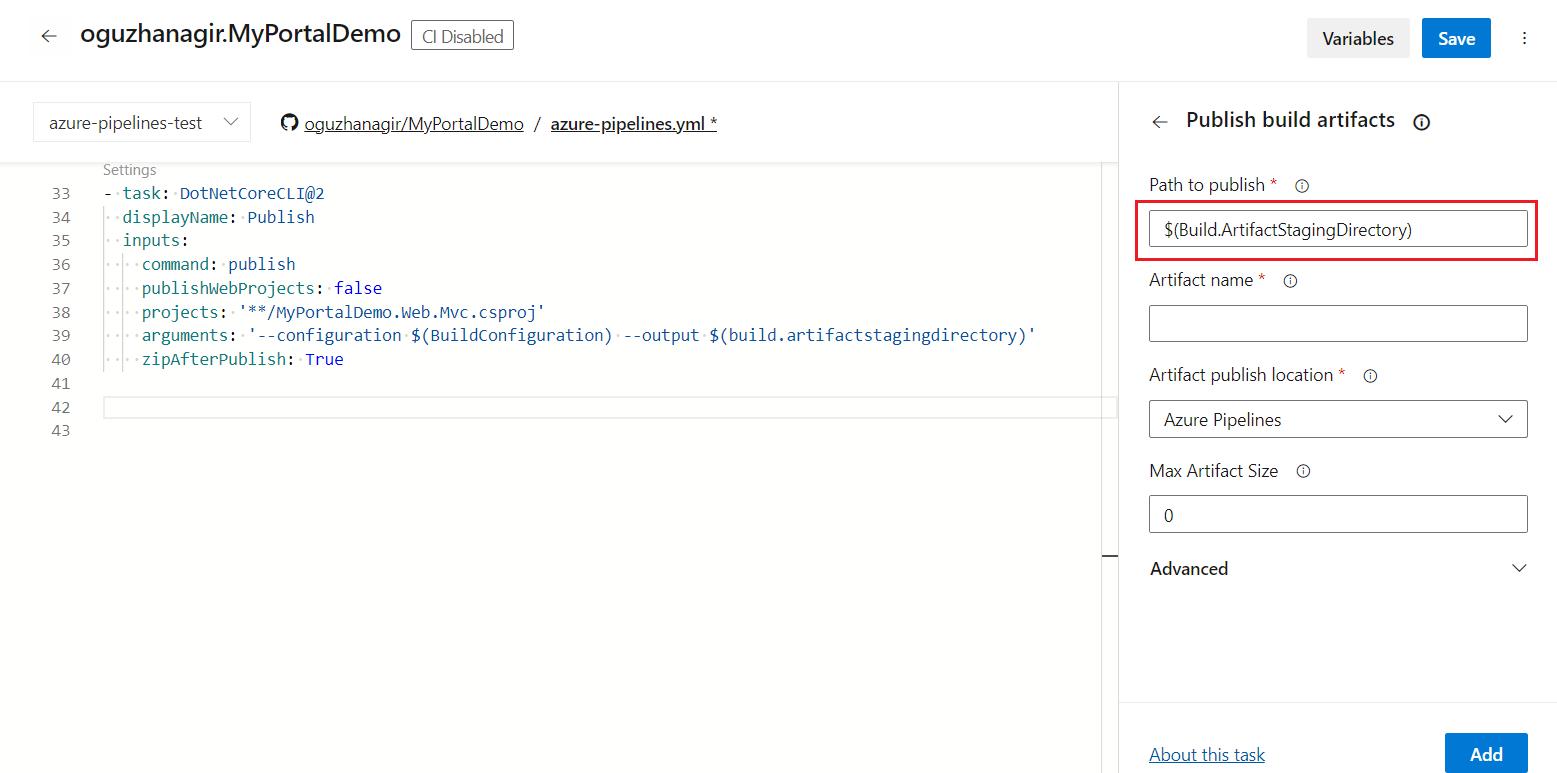
Add the path of the Publish Artifact project
Additional pipeline steps for the MVC project
There are 3 additional steps we must add for ASP.NET Zero Core MVC project.
Note: The ASP.NET Zero MVC project now uses pnpm (pinned to
[email protected]via thepackageManagerfield inpackage.json) instead of Yarn. The simplest approach on Azure Pipelines is a Command Line task that enables Corepack and runspnpm install, since Corepack ships with Node.js 16.10+ and activates the pinned pnpm version automatically. Do not pin the agent to an older pnpm version: pnpm 9 and older cannot read the settings inpnpm-workspace.yamland fail withERROR packages field missing or empty.
Execute pnpm install Task
For the MVC project, we have to run
pnpm installin thesrc/MyPortalDemo.Web.Mvcfolder. To do this click theShow assistanticon on top of the task list.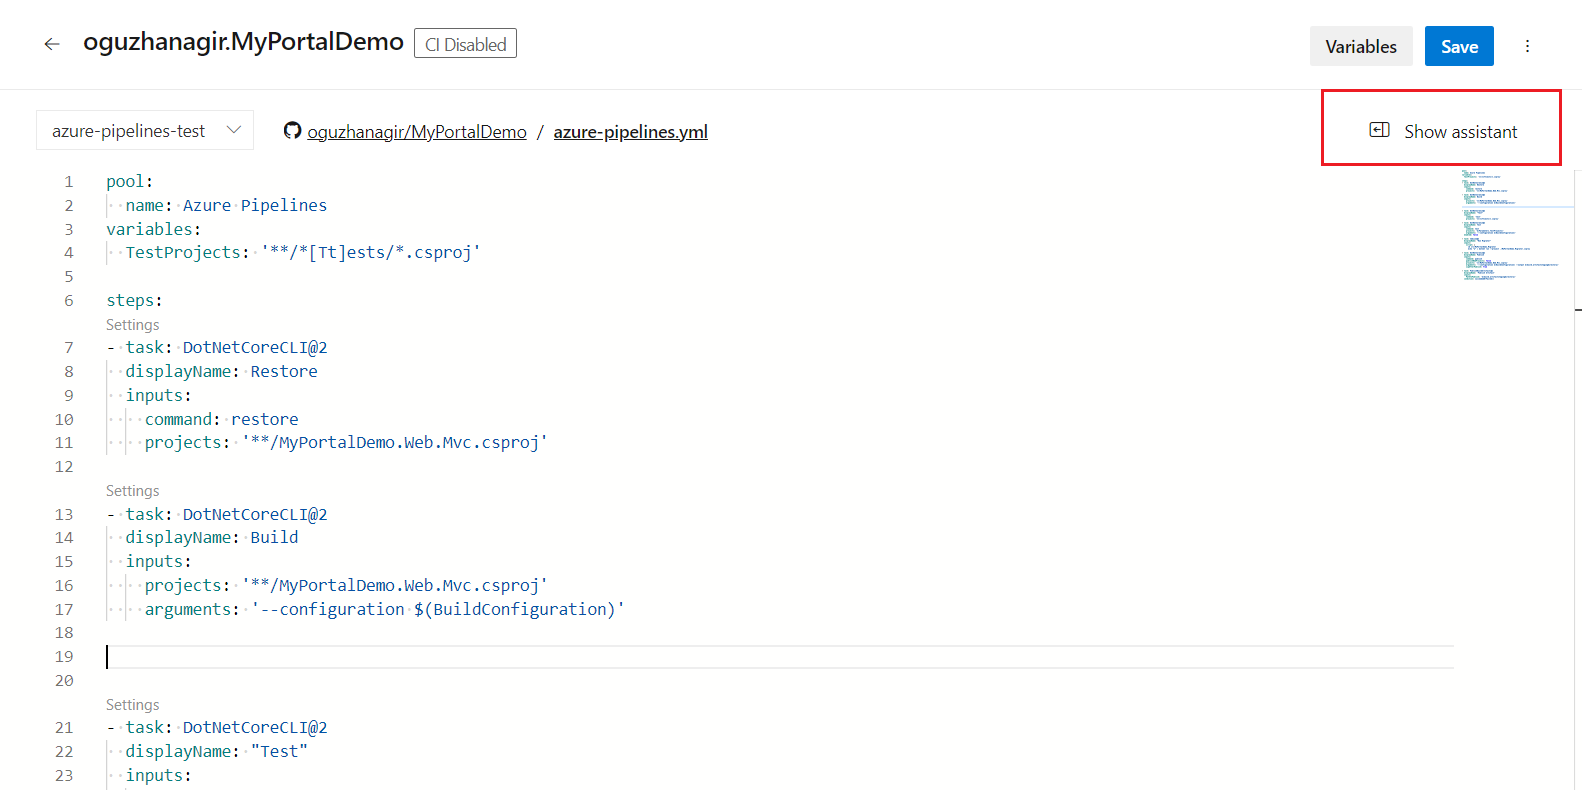
In the Tasks panel, search for Command Line and select the Command line task. Place it right after the Build step.

Use the following script and set the Working Directory (under Advanced) to
src/MyPortalDemo.Web.Mvc:corepack enable pnpm install --frozen-lockfile
This installs the pnpm version pinned in
package.jsonand restores client-side dependencies. This step is completed.Save the changes by clicking Save button on the toolbar.

pnpm run build Task
To add the production build task, write
command lineto the search textbox. Click the Add button of Command Line item.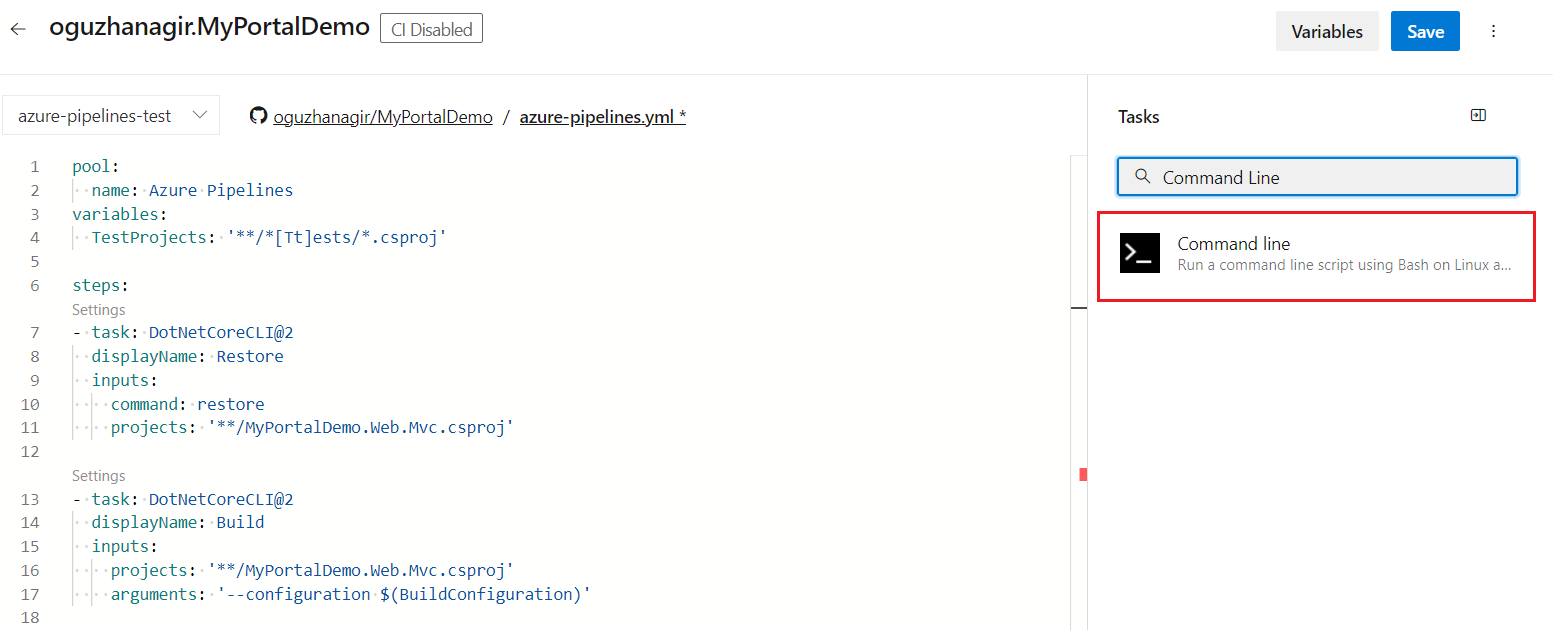
It will append it right after the pnpm install task. If it comes to the end, you need to move it after the pnpm install task.
Use the following script and set the Working Directory (under Advanced) to
src/MyPortalDemo.Web.Mvc:pnpm run build
Save the changes by clicking the Save button on the toolbar.
Run Migrator
To run the *Migrator project here, a CMD line is required. Let's create it as specified below.
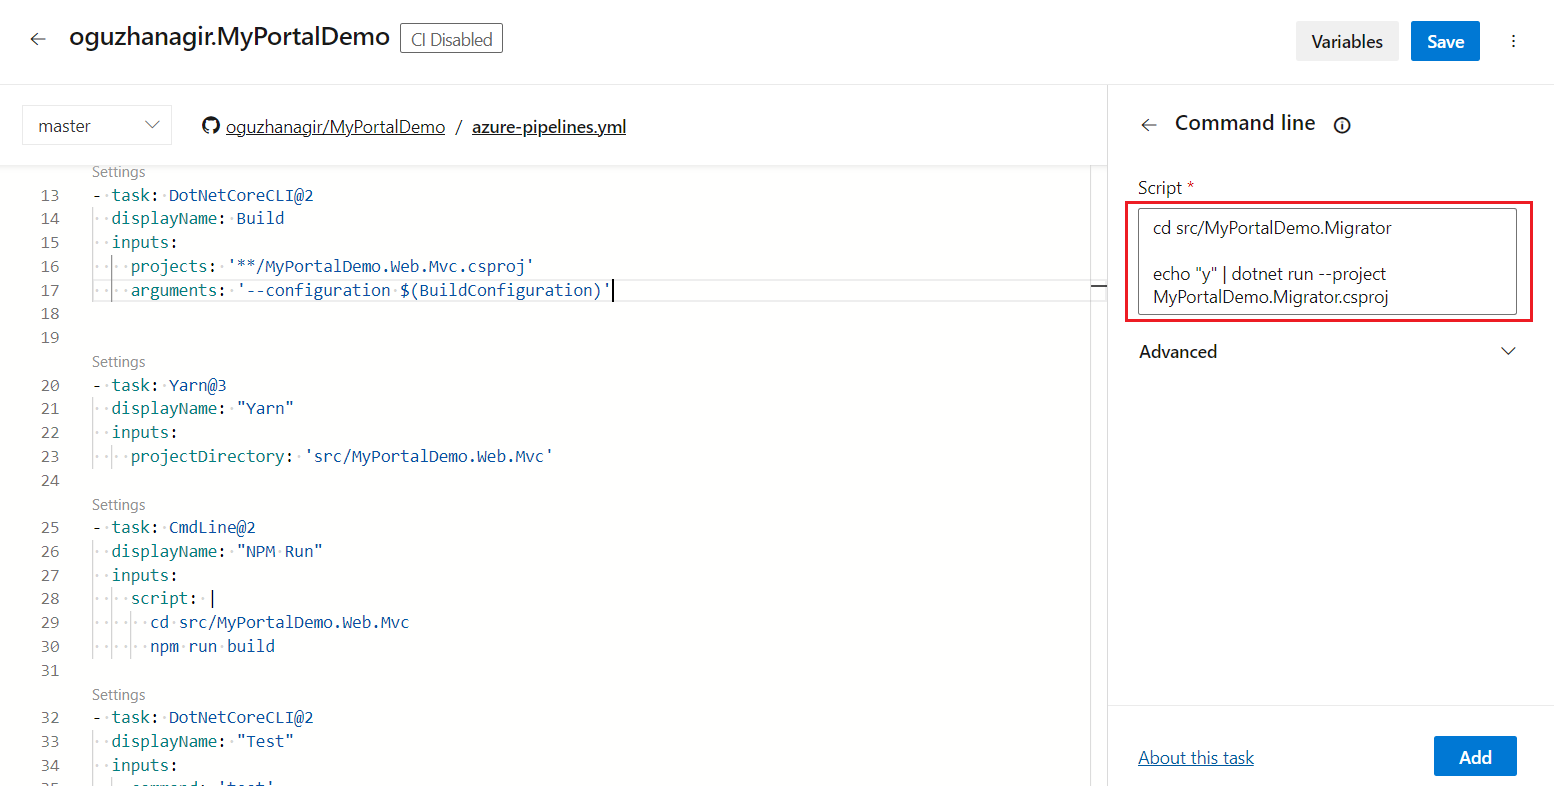
cd src/MyPortalDemo.Migrator
echo "y" | dotnet run --project MyPortalDemo.Migrator.csproj
The part indicated as
"y"implies acceptance on all tenants in the host database.
After clicking the Save button on the toolbar, press the Run button. The pipeline will start for the first time.

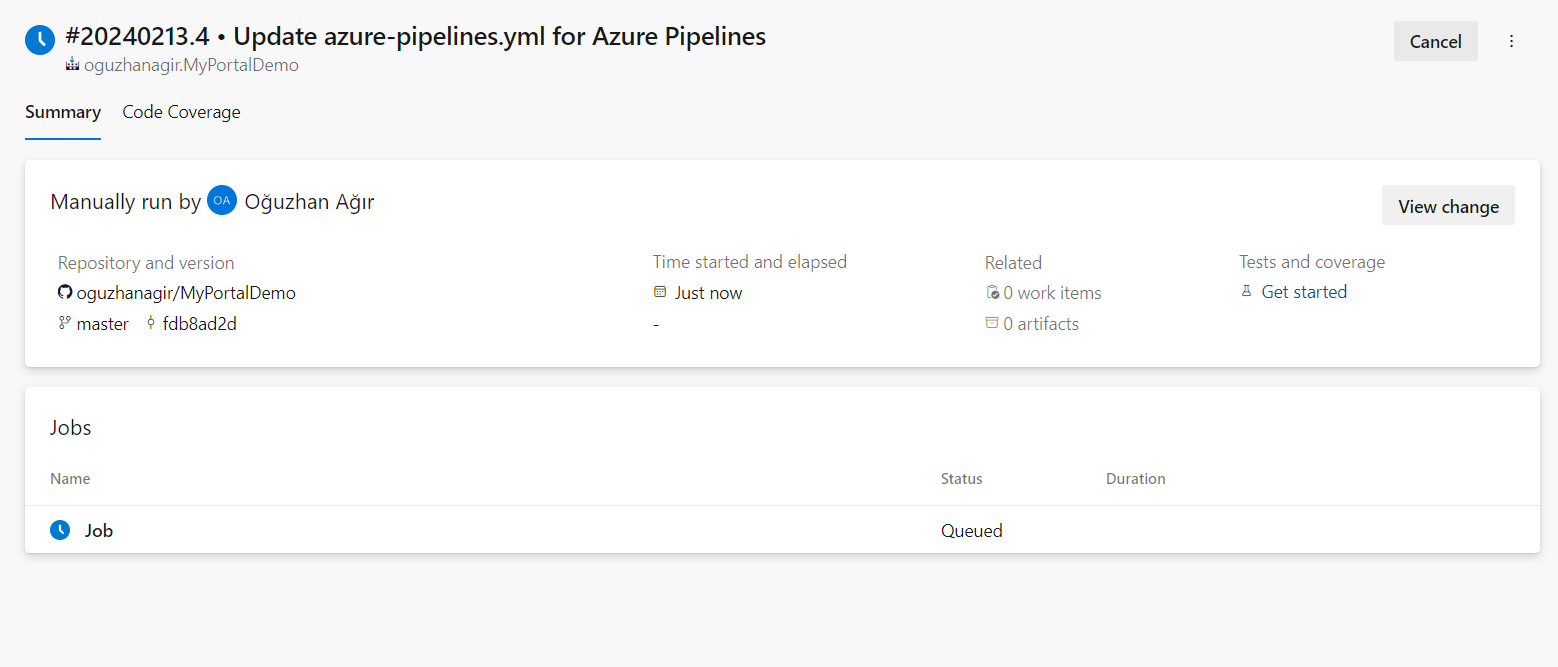
So far, we have created a pipeline to get our project from GitHub, build, pnpm install, pnpm run build, test and publish. The next step is copying the publish output to Azure App Service.
Before starting this step, we assume that you have already created a web app on Azure App Services and set up your database.
Create release pipeline
Select Azure App Service deployment template.
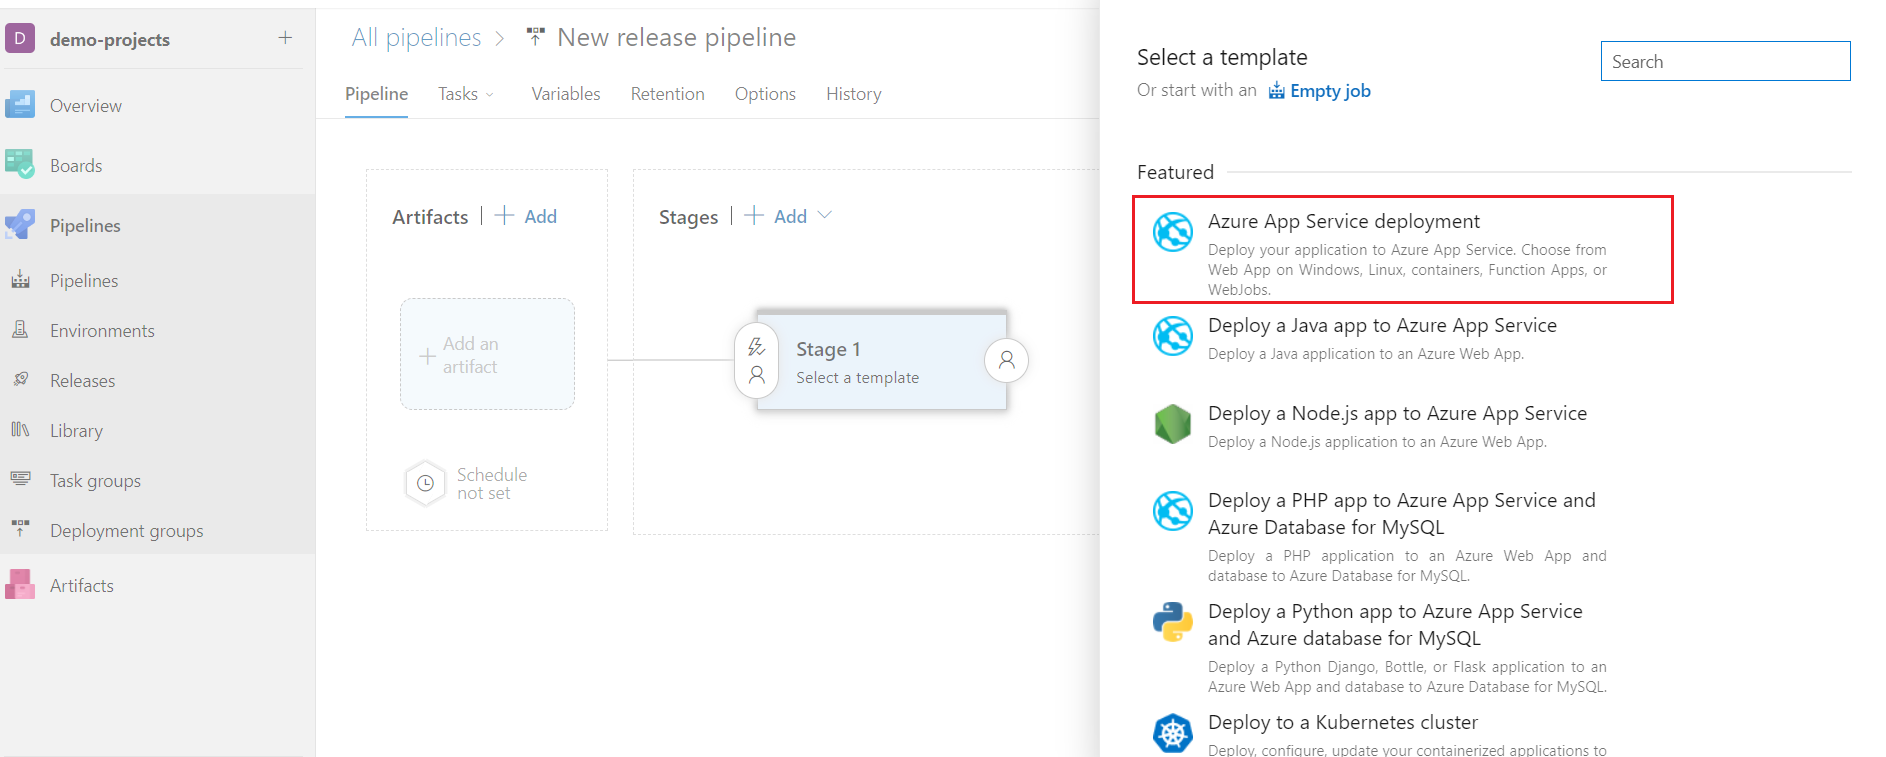
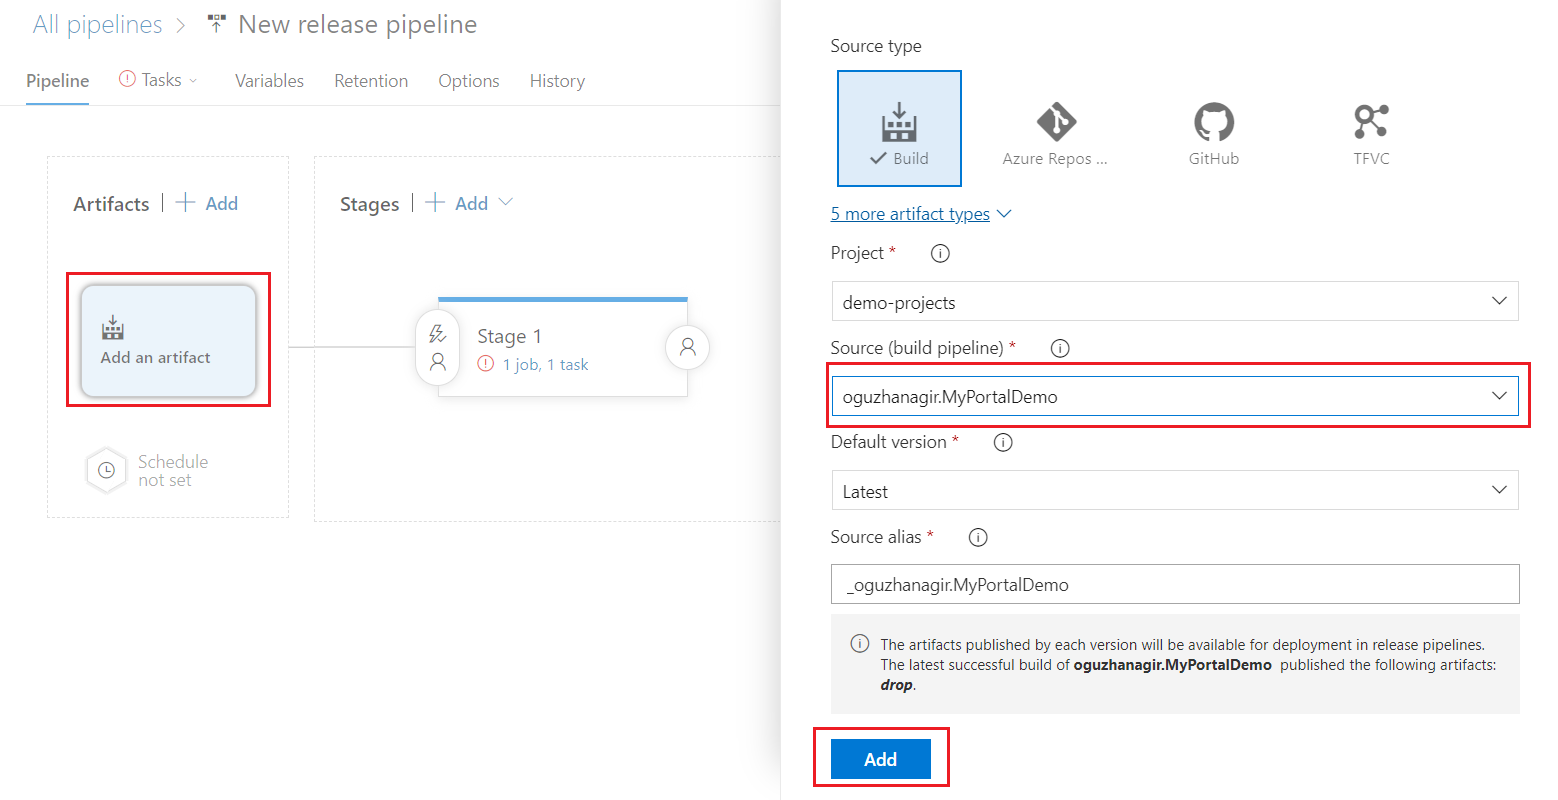
Add an artifact
Click Add an artifact button and choose the related project as source.
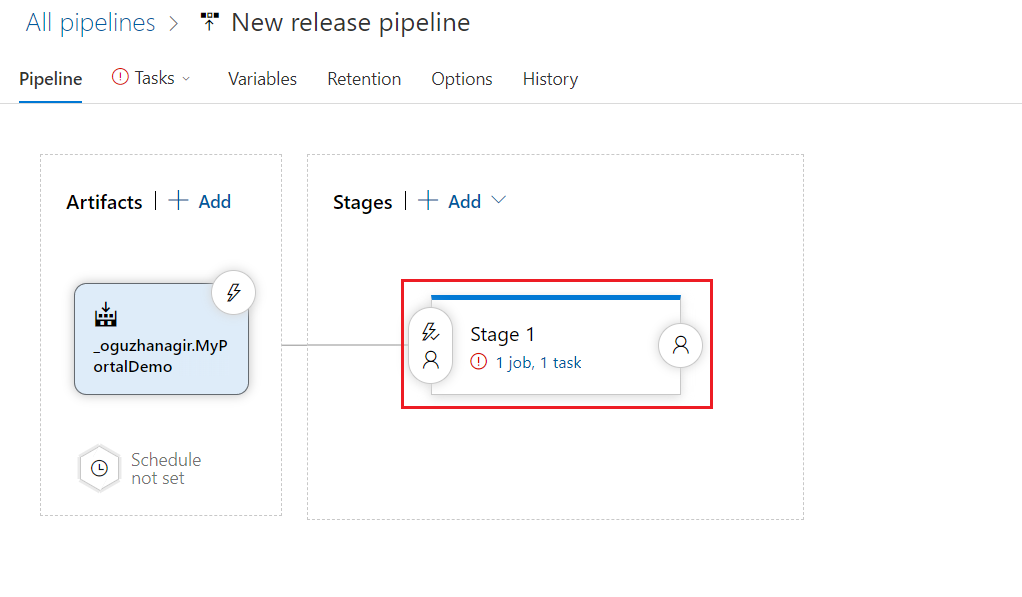
Then click the default stage to edit.
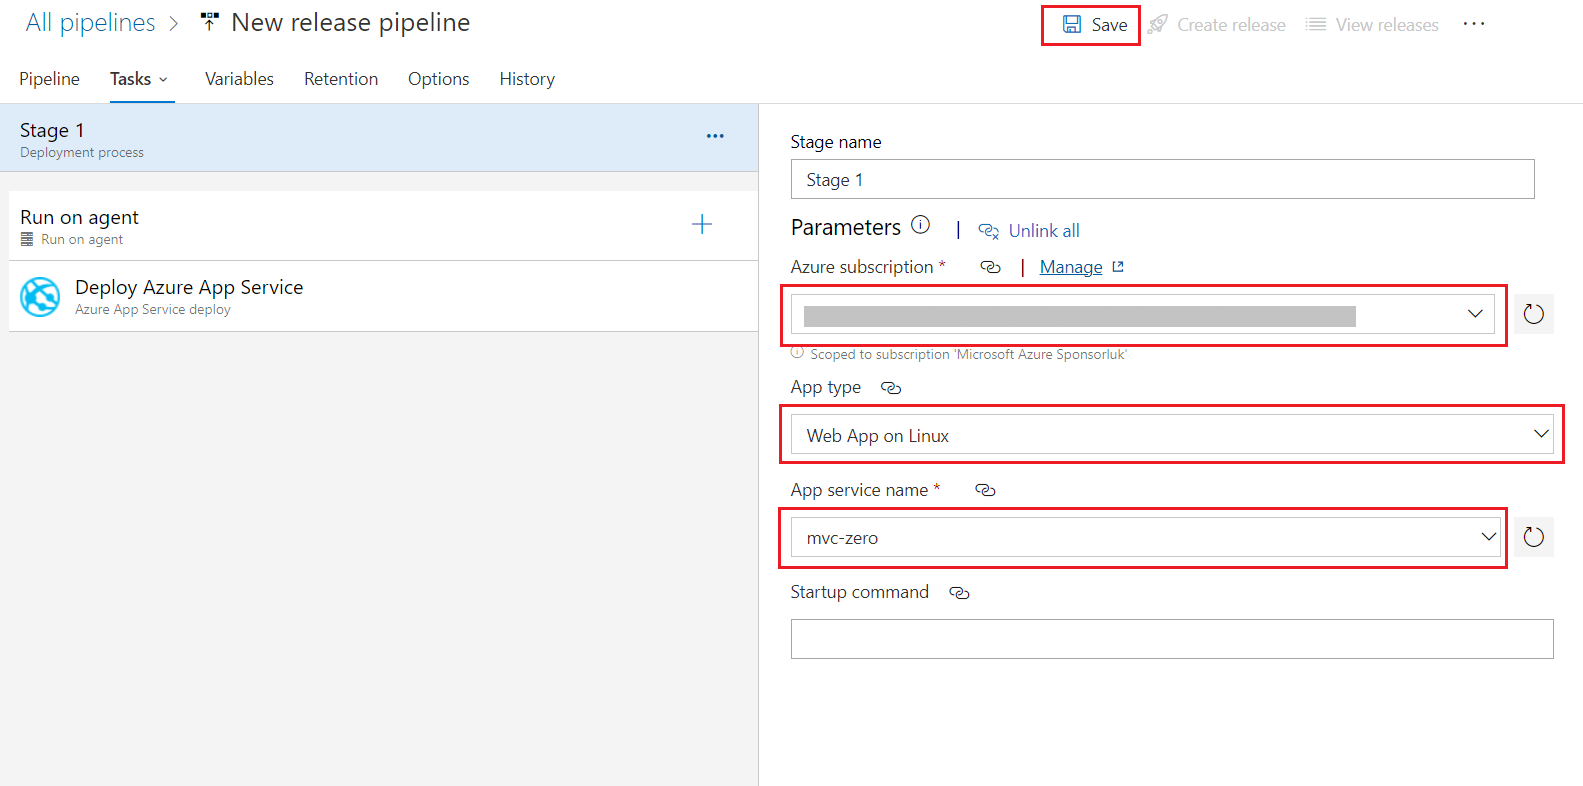
On the new release pipeline, you will see Deploy Azure App Service options. Select your Azure subscription and then authorize it. Set Web App on Linux as your app type. Then pick your app service name from the list. Finally click Save button.
Choose Web.Mvc package for releasing
One important setting is the package or folder setting. We will release *.Web.Mvc. To set that package click the ... button on the Package or folder row.
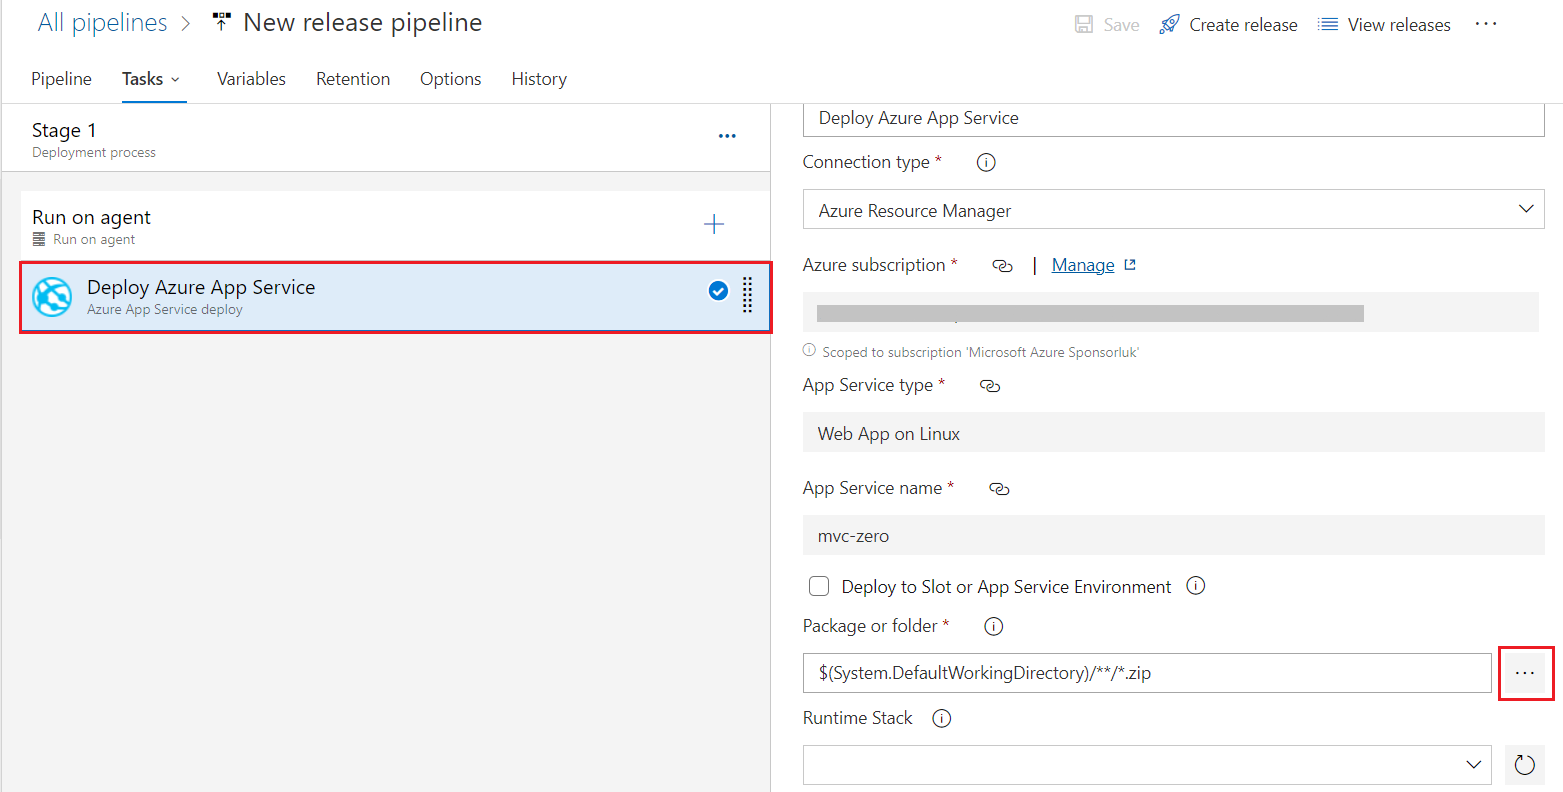
Choose *.Web.Mvc and then click Save button on the top toolbar.
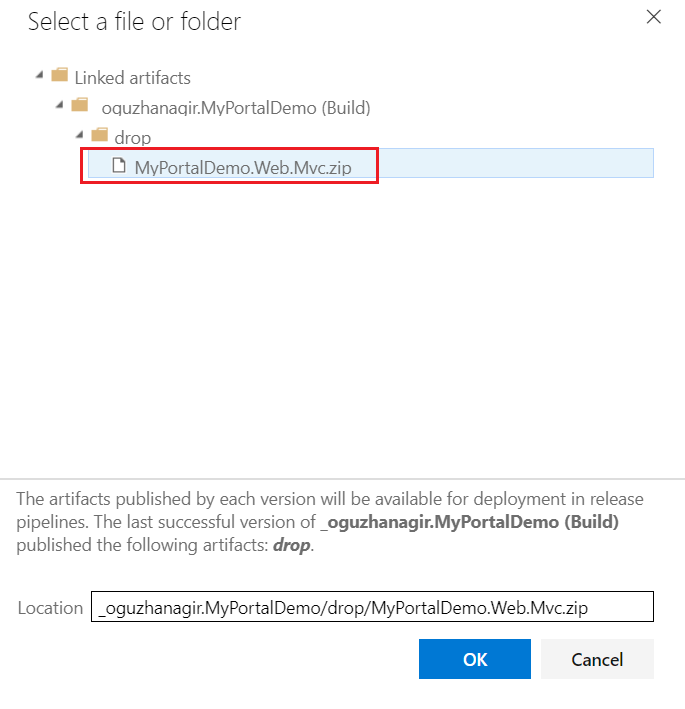
Click the save button after the changes.

Release for the first time
Now we are done! Click the Create release button on the top toolbar and click Create on the new opened dialog. This will copy our last publish output to the selected Azure App Service.

After clicking on the Create Release button, select the stage and click on the Create button.
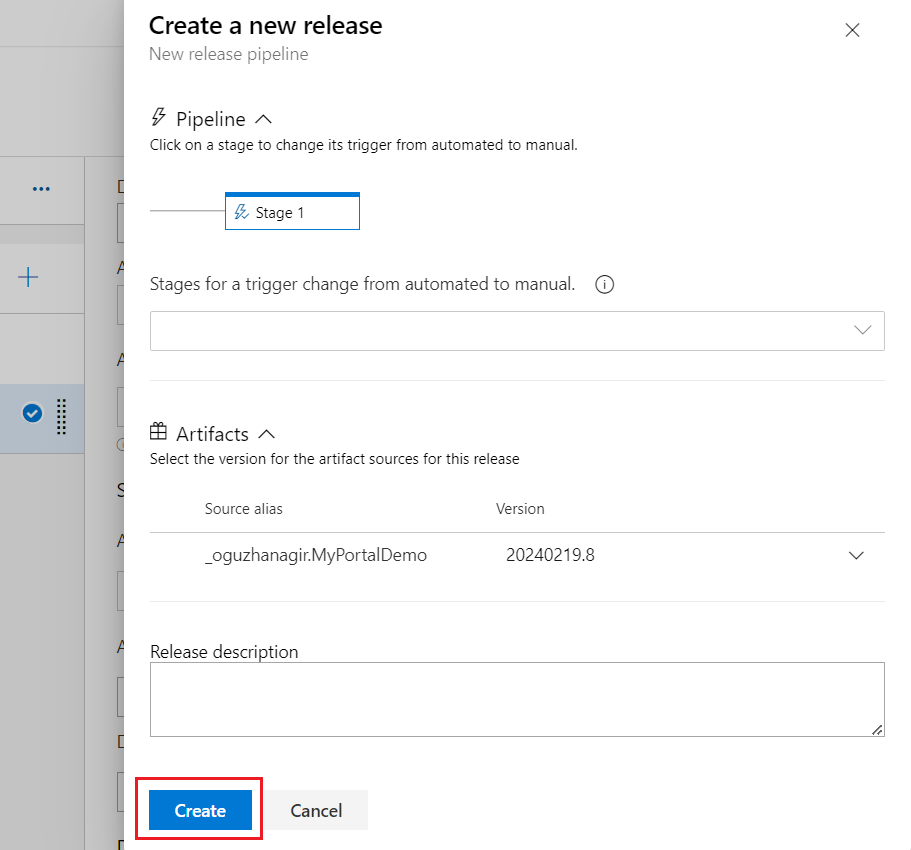
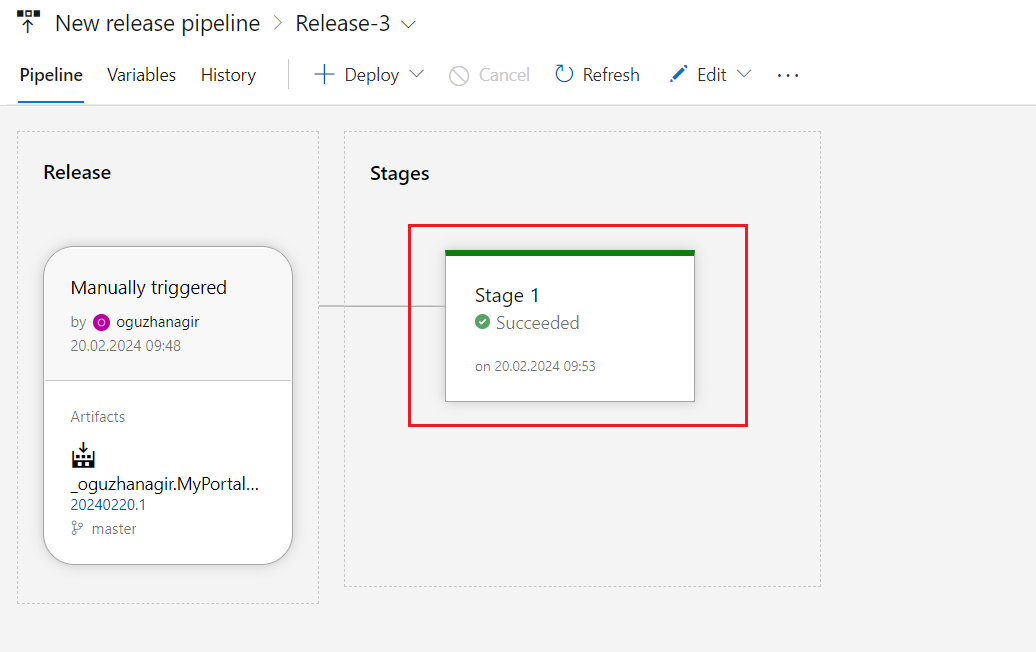
When you see the green tick for your release, it means it's successfully completed.