File Upload Tutorial
Uploading a file in an ASP.NET Zero application is not different than a regular ASP.NET Core & Angular application. In this tutorial, we will implement a file upload functionality in ASP.NET Zero. We will also send an additional field to server while uploading a file.
This tutorial assumes that, you already have a valid ASP.NET Zero license and already created an empty project by following Getting Started document.
First, create a class named FileUploadViewModel in *.Web.Host\Areas\AppAreaName\Models folder. This class will be used to transfer additional parameters during the upload process.
Then, create a controller named FileUploadController in *.Web.Host\Controllers folder. This controller will handle the upload process.
The server side of the implementation is done. Let's move to Angular application.
Go to angular folder in your project.
Open a terminal and run
cd src\app\admin.Run
ng g component file-upload. That will create a component in admin folder.Go to src\app\shared\layout\nav\app-navigation.service.ts and add new menu item
Go to src\app\admin\admin-routing.module.ts and add new route for file upload page
Go to generated file-upload.component.html file and change the content as seen below
Go to generated file-upload.component.ts file and change the content as seen below
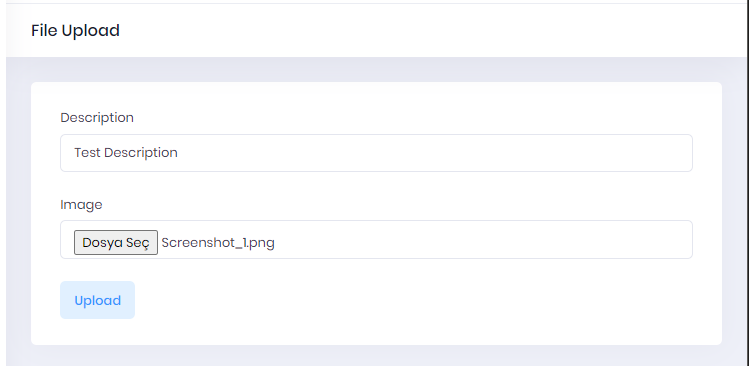
Then you will have a file upload page as seen below.