Step By Step Publish To Azure
Introduction
Before reading this document, it's suggested to read Getting Started to run the application and explore the user interface. This will help you to have a better understanding of concepts defined here.
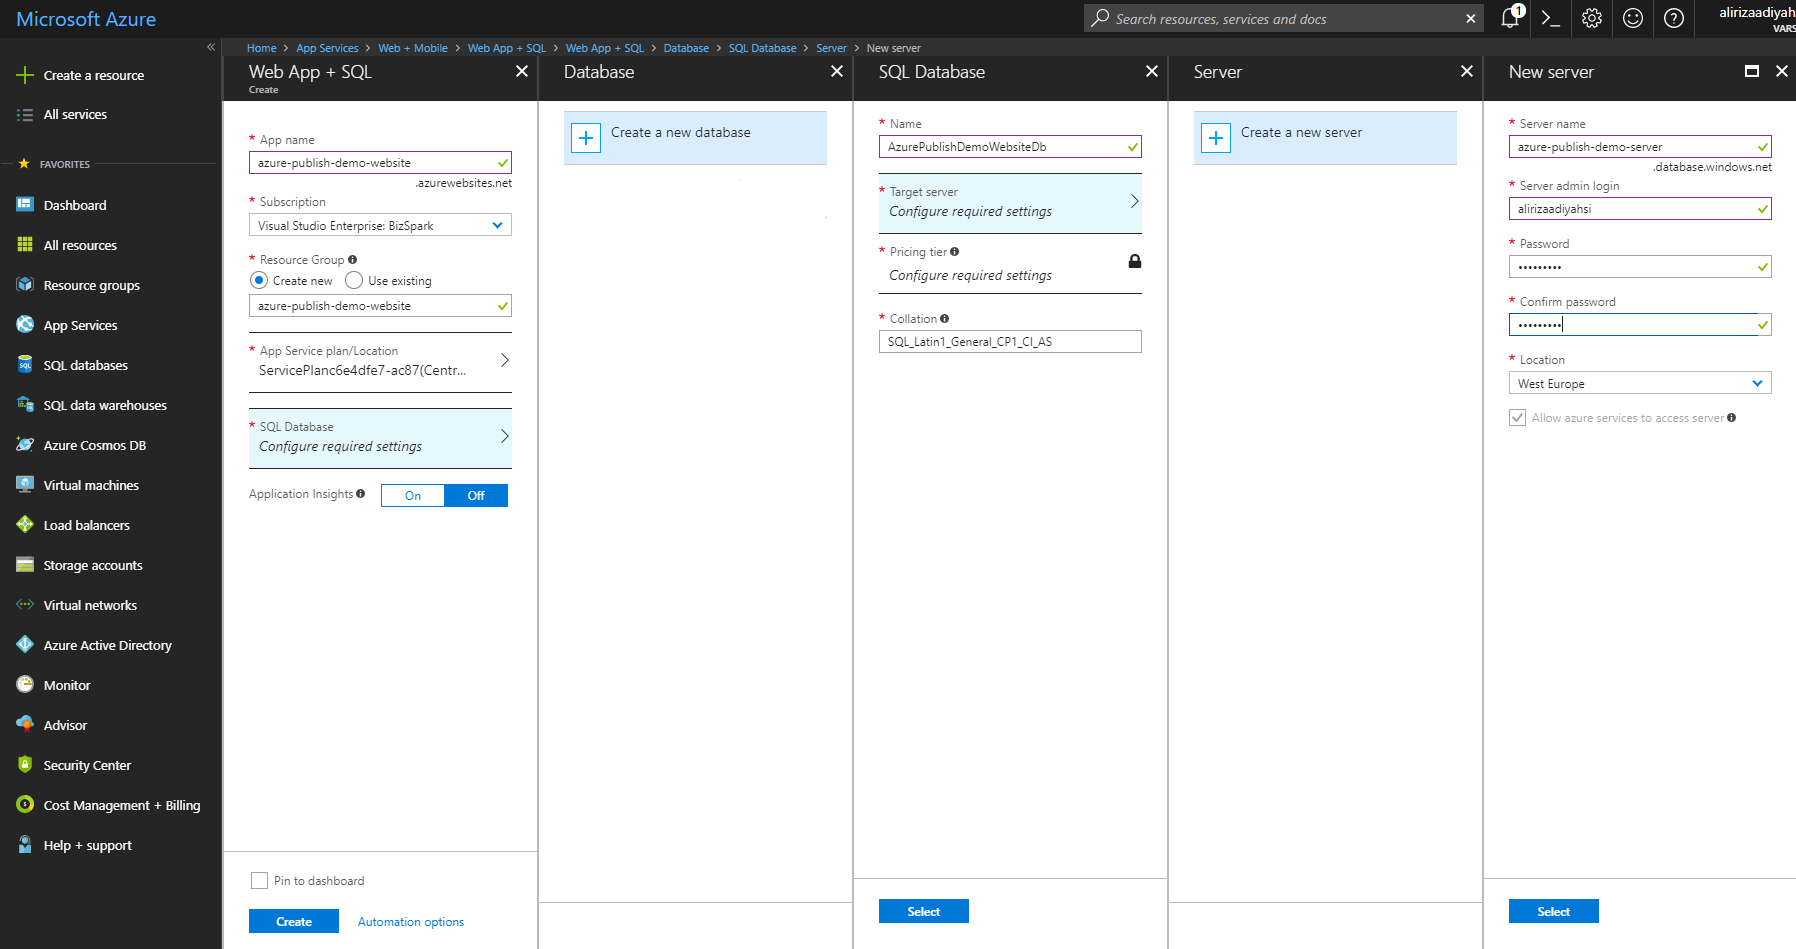
Creating an Azure Website
Select the "Web App + SQL".
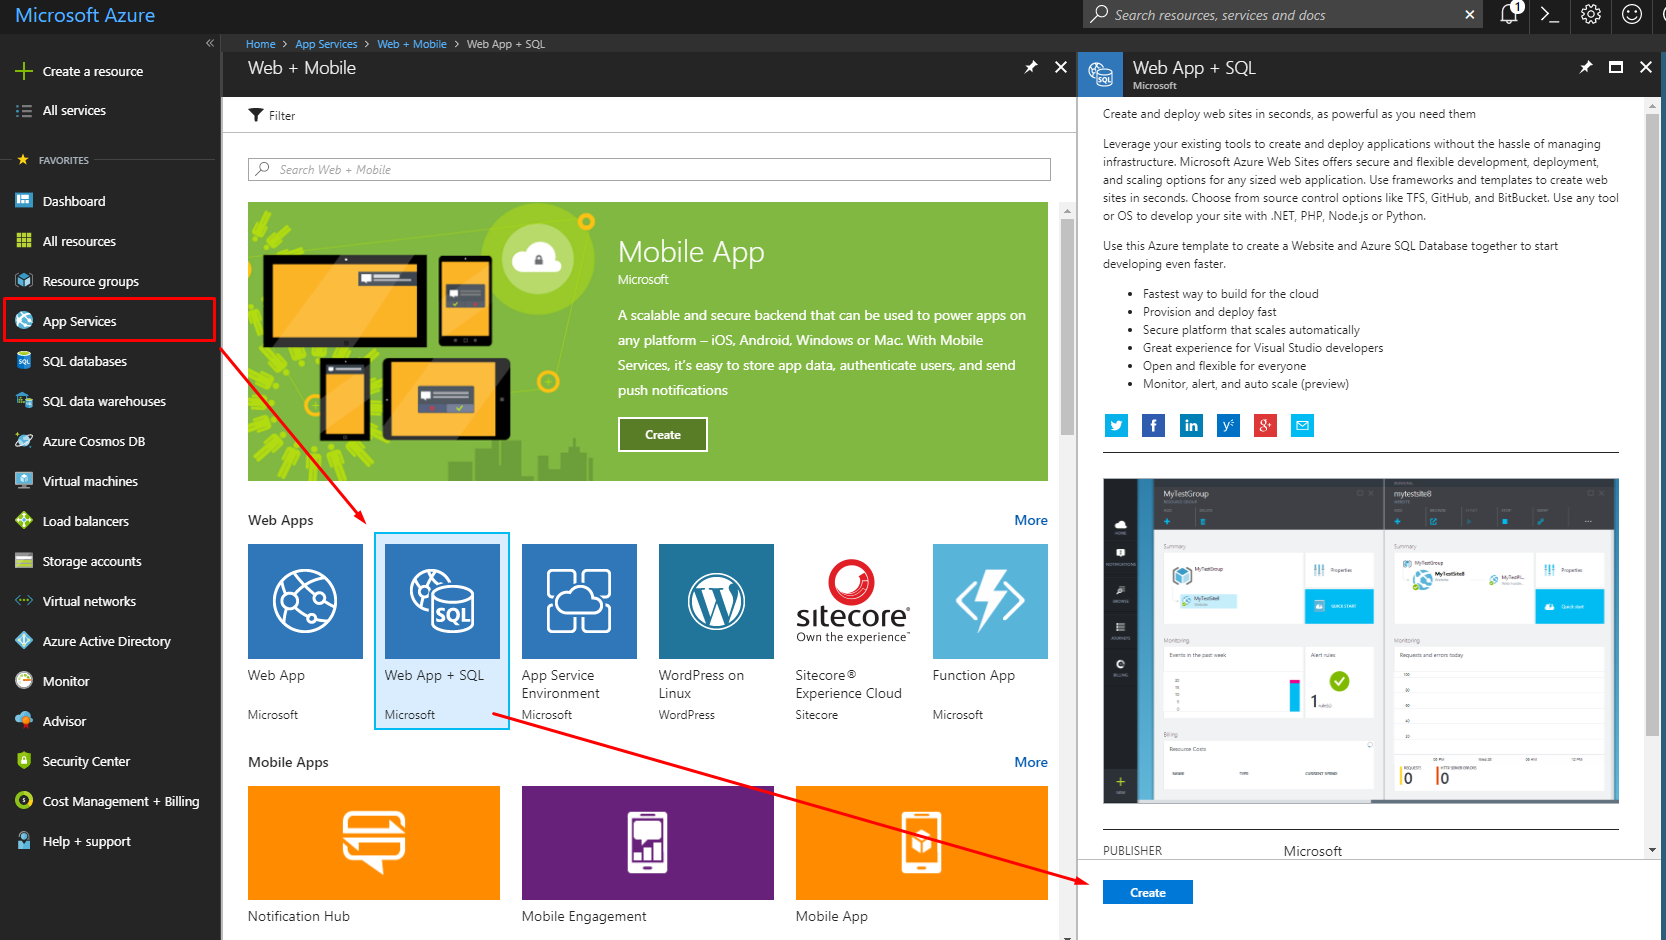
And configure it according to your needs. A sample setting is shown below:
Publish Application to The Azure
The details will be explained in the next lines. Here are the quick steps to publish the Web Application to the Azure.
- Run the migrations on the Azure
- Configure the Web.config file
- Publish the application to the Azure
Run Migrations on The Azure
One of the best ways to run migrations on the Azure is running update-database command in the Visual Studio.
But this command won't run. Your client IP address should have access to the Azure.
Configuring the Firewall for Client Access
The easiest way: Open Management Studio and write the Azure database settings, then click connect. If you are already logged in to the Azure, following info screen will be shown (if you aren't already logged in, a form will be displayed before the following screen to logging in):
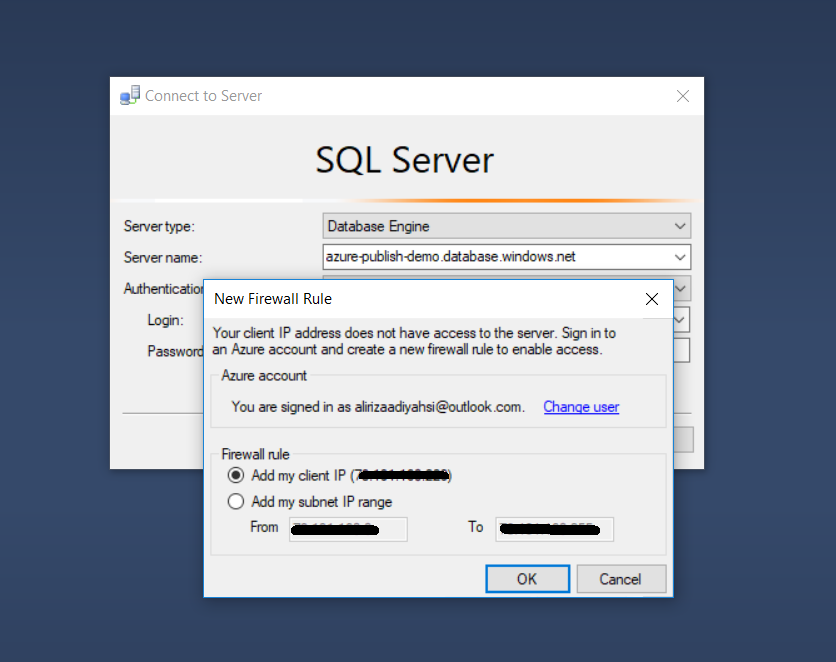
Now our client IP address have access to the Azure. Of cource, this operation can also be done via the Azure Portal. Check here to learn how to configure the firewall for client access via Azure Portal.
Apply Migrations
Open Web.config in .Web project and change connection string according to the Azure Database:

Open Package Manager Console in Visual Studio, set .EntityFramework as the Default Project and run the update-database command as shown below:

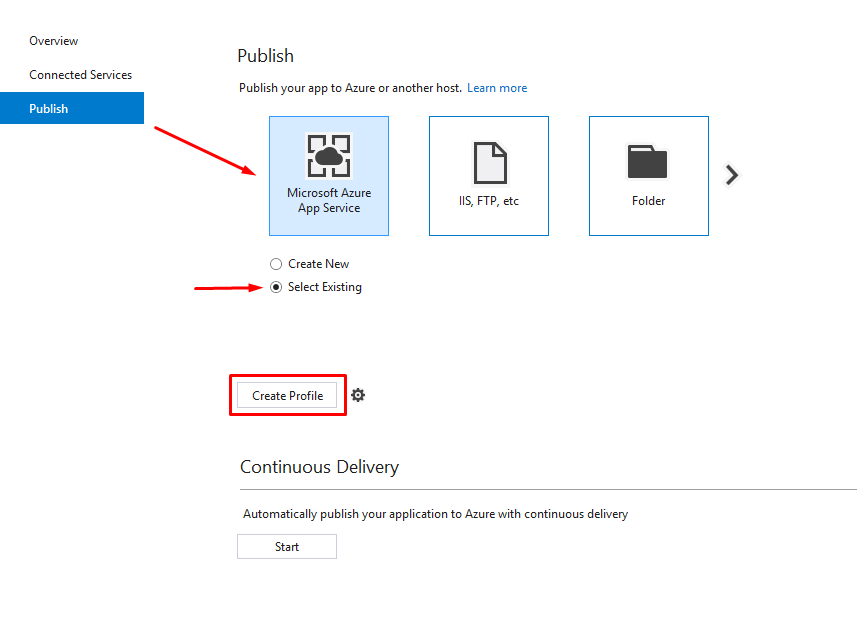
Publish
Right click the Web project and select "Publish". Select "Microsoft Azure App Service" and check "Select Existing". Click "Create Profile" button.
Following screen will be shown:
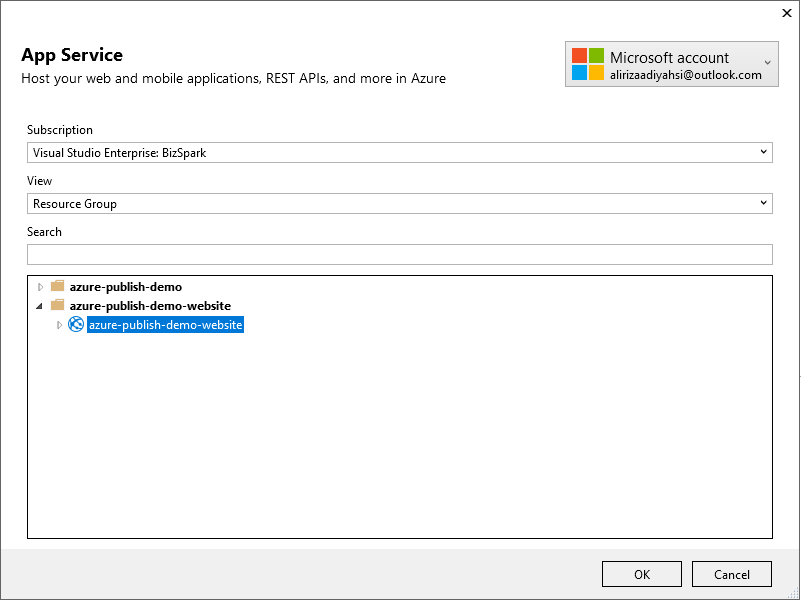
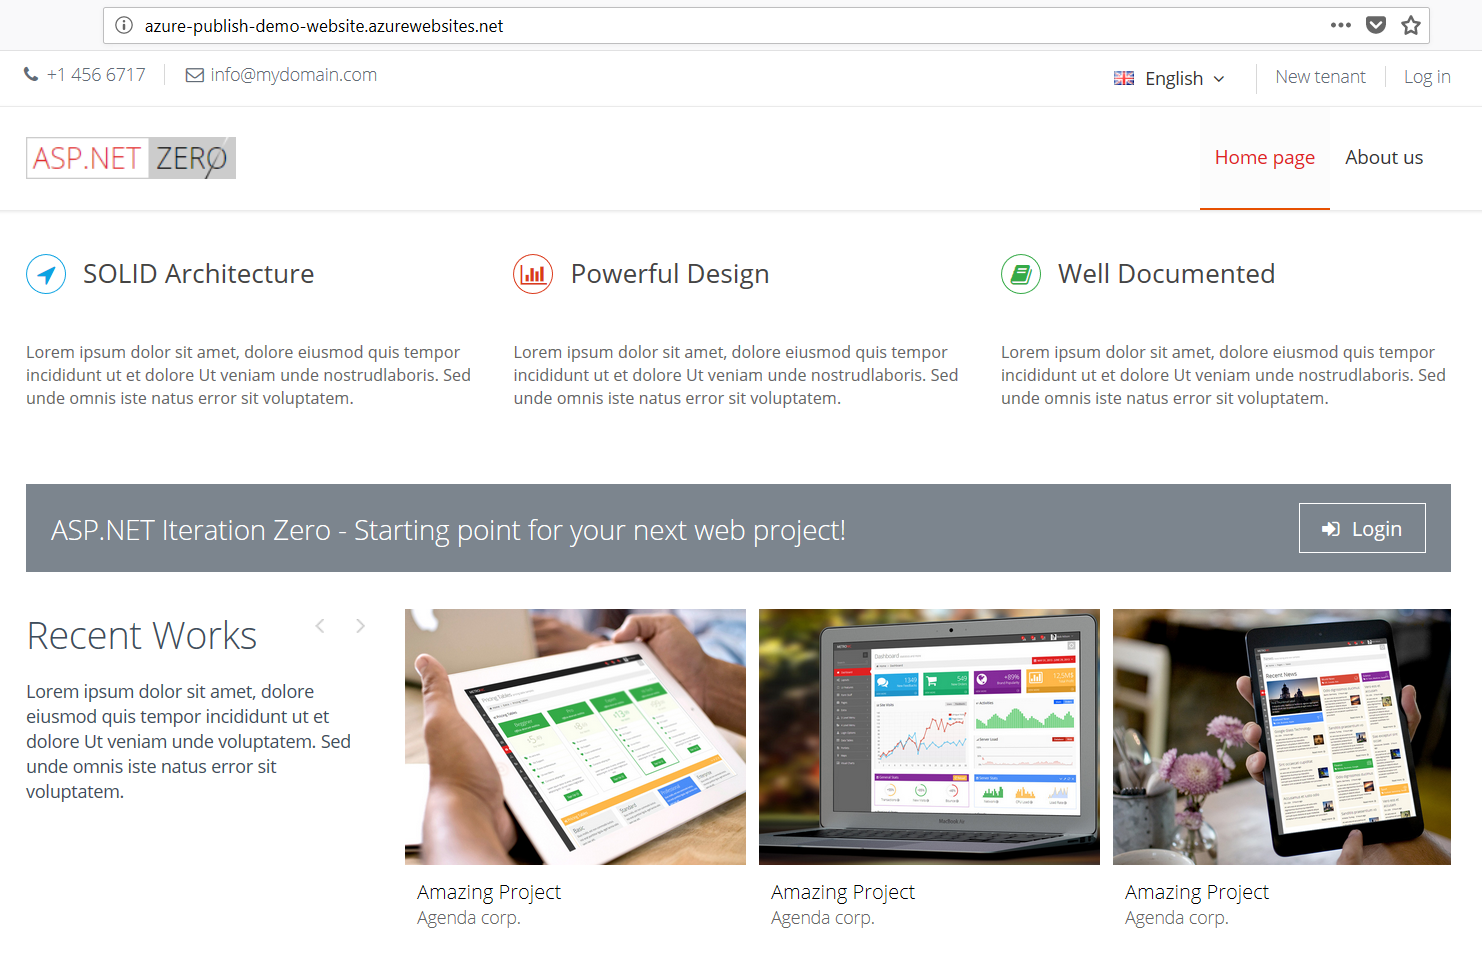
Select "azure-publish-demo-website" and click "OK", then click "Publish" button. Web application is live now: