MAUI Step by Step Development
Introduction
In this document, we will create a sample MAUI phonebook application step by step integrated with ASP.NET Zero website. Be aware that only ASP.NET Core version is supported.
Downloading Phonebook-Core Sample
In the Developing Step By Step document we have already seen how to create a phonebook on server side and web client. In this document we will resume this project. We will build a phonebook application on ASP.NET Zero MAUI project. Download the solution Acme.PhoneBookDemo and open the Acme.PhoneBookDemo.Mobile.sln file.
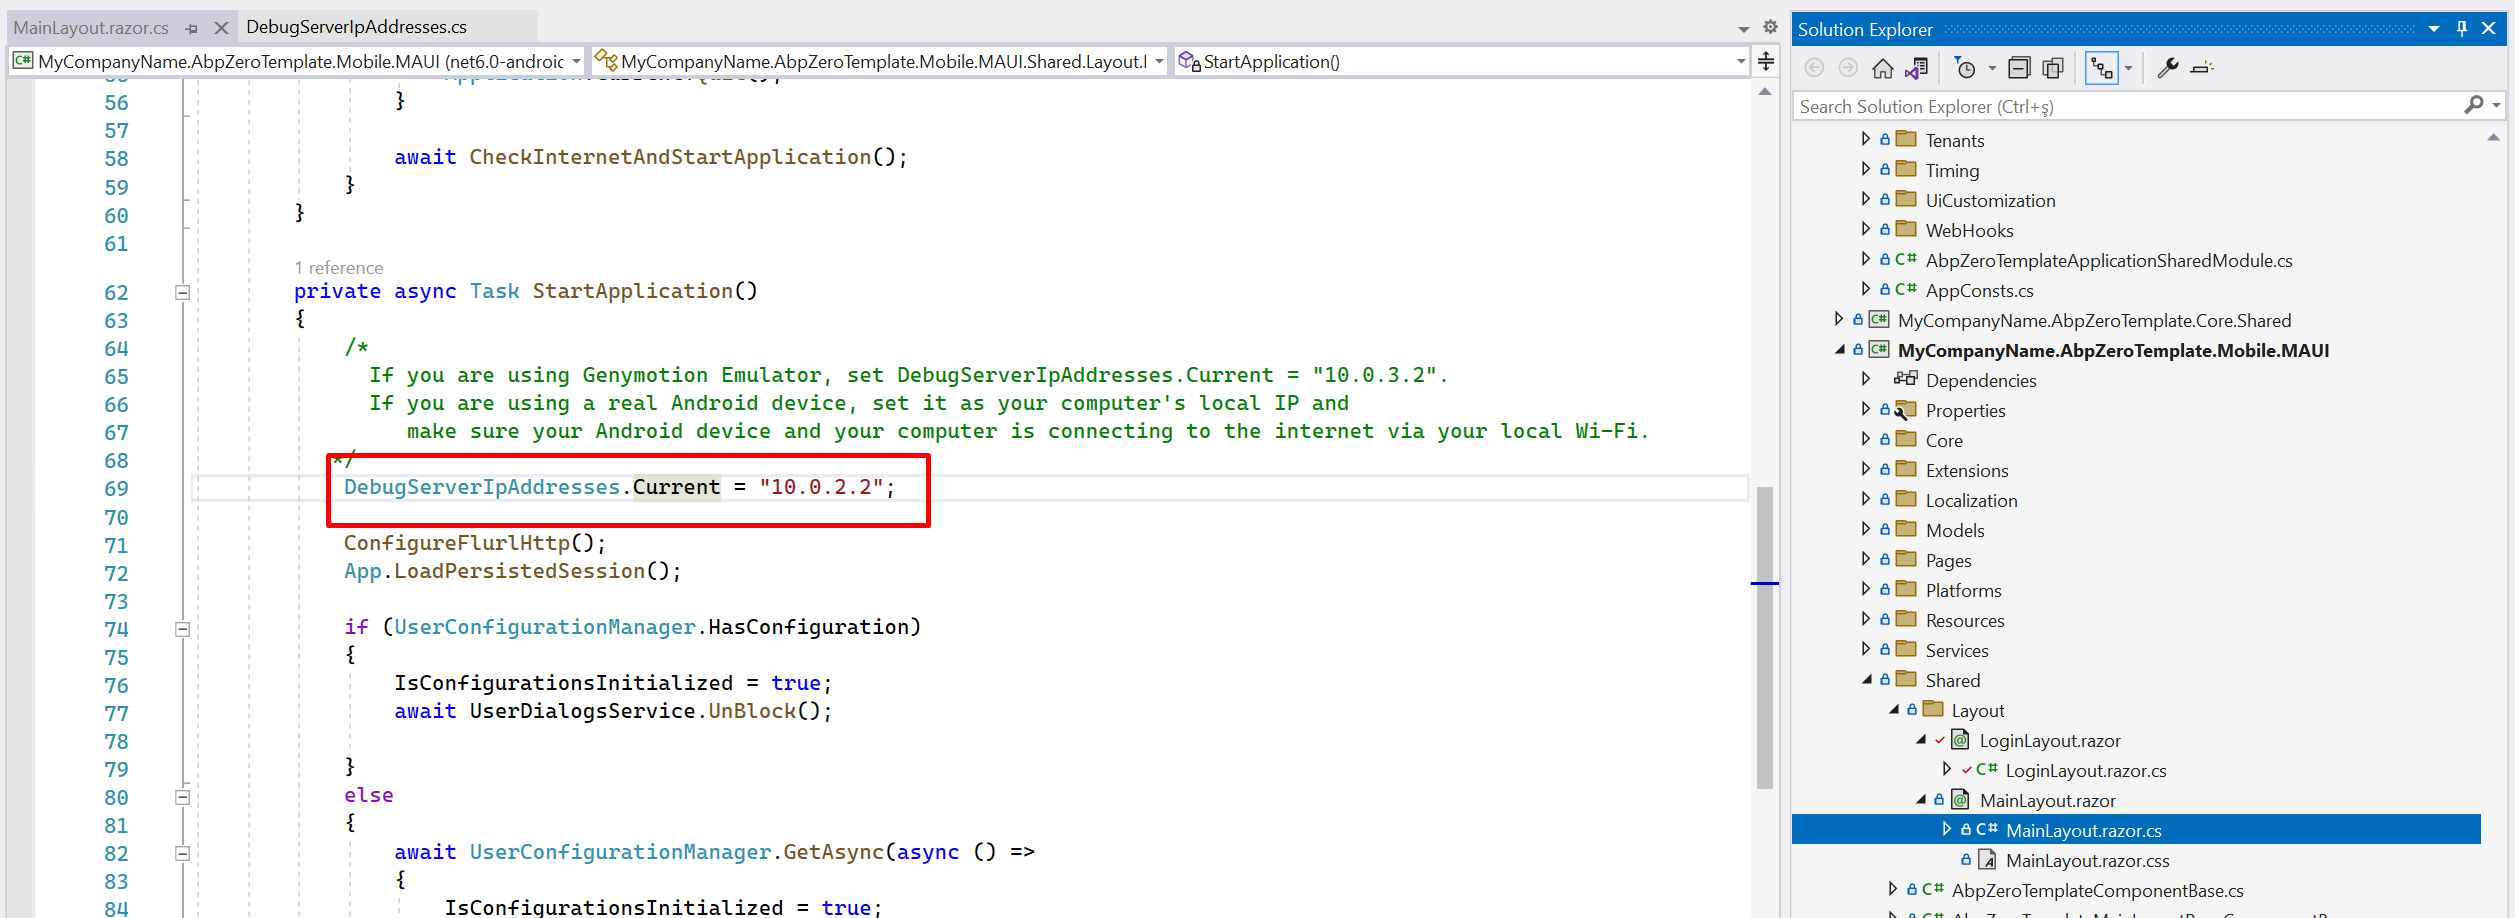
Configuring Host Address
If you are using an emulator, you can use the emulator's loopback address to reach your local computer. Eg: for Android emulator, it's 10.0.2.2
Creating Phonebook Application Service Proxy
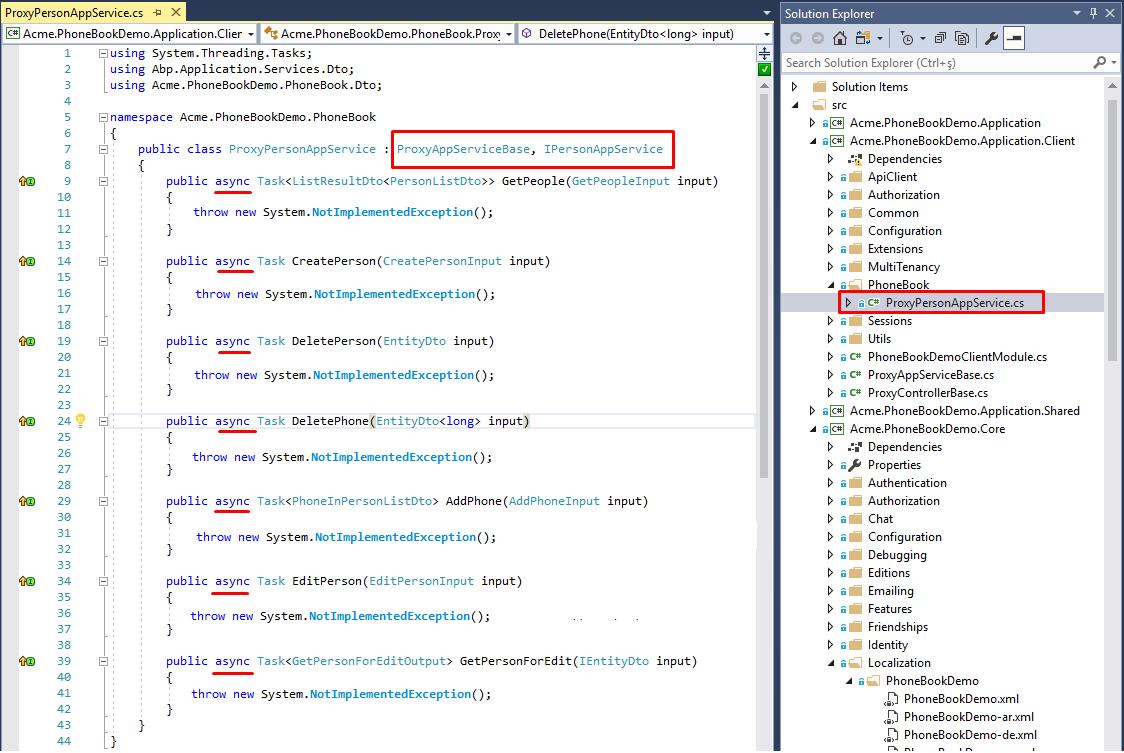
To consume server API methods, we need to implement the IPersonAppService application service over HTTP transmission. Create a new folder called PhoneBook in Acme.PhoneBookDemo.Application.Client project.
Then create a new class called ProxyPersonAppService in the PhoneBook folder. Derive ProxyPersonAppService from ProxyAppServiceBase, IPersonAppService interface. Visual Studio will help us to add all unimplemented methods from IPersonAppService at once.
Add async keyword to all methods to be able to benefit from multi-tasking.
Implementing App Service Methods
In the ProxyAppServiceBase class you'll see ApiClient, which is being used to call host web API methods. We'll use ApiClient to transfer data with host.
ApiClient has post, put, get, delete HTTP methods. To decide which needs to be called for the corresponding method you can read ASP.NET Boilerplate Application Services as Controllers.
To summarize that document: ASP.NET Boilerplate framework uses ConventionalHttpVerbs by default. This means there's a naming convention while implementing app service methods. When method name starts with:
- Get => ApiClient.GetAsync<T>(...);
- Put or Update => ApiClient.PutAsync<T>(...);
- Delete or Remove => ApiClient.DeleteAsync<T>(...);
- Post, Create or Insert => ApiClient.PostAync<T>();
- If none of the above => Post is used as default.
Based on the above information, we will implement the methods. The first method is GetPeople, it starts with Get prefix, so we have to use ApiClient.GetAsync(...) method.
GetEndPoint(...) adds the method name as a segment for the target host web API url. You have to pass the name of the application service method to GetEndPoint():
public async Task<ListResultDto<PersonListDto>> GetPeople(GetPeopleInput input)
{
    return await ApiClient.GetAsync<ListResultDto<PersonListDto>>(GetEndpoint(nameof(GetPeople)), input);
}
Do the same for other methods. The final view of ProxyPersonAppService class should be like this:
public class ProxyPersonAppService : ProxyAppServiceBase, IPersonAppService
{
    public async Task<ListResultDto<PersonListDto>> GetPeople(GetPeopleInput input)
    {
        return await ApiClient.GetAsync<ListResultDto<PersonListDto>>(GetEndpoint(nameof(GetPeople)), input);
    }

    public async Task CreatePerson(CreatePersonInput input)
    {
        await ApiClient.PostAync(GetEndpoint(nameof(CreatePerson)), input);
    }

    public async Task DeletePerson(EntityDto input)
    {
        await ApiClient.DeleteAsync(GetEndpoint(nameof(DeletePerson)), input);
    }

    public async Task DeletePhone(EntityDto<long> input)
    {
        await ApiClient.DeleteAsync(GetEndpoint(nameof(DeletePhone)), input);
    }

    public async Task<PhoneInPersonListDto> AddPhone(AddPhoneInput input)
    {
        return await ApiClient.PostAync<PhoneInPersonListDto>(GetEndpoint(nameof(AddPhone)), input);
    }

    public async Task EditPerson(EditPersonInput input)
    {
        await ApiClient.PostAync(GetEndpoint(nameof(EditPerson)), input);
    }

    public async Task<GetPersonForEditOutput> GetPersonForEdit(IEntityDto input)
    {
        return await ApiClient.GetAsync<GetPersonForEditOutput>(GetEndpoint(nameof(GetPersonForEdit)), input);
    }
}
When we complete the communication phase with the host service, we can start to create person and person detail view for mobile.
Creating People Page
Creating
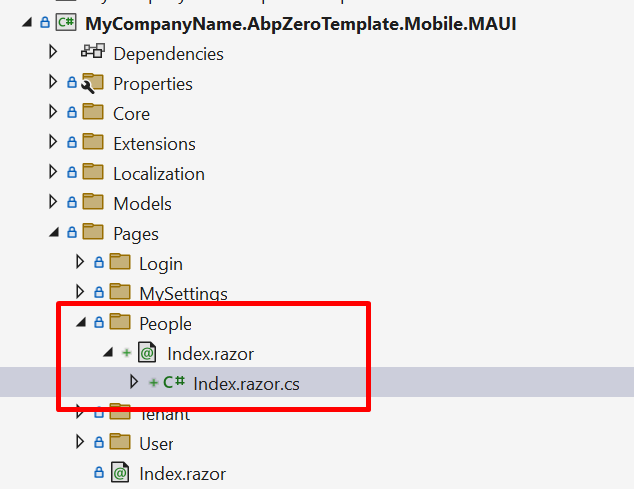
PeopleView is going to list all the people. When we tap one of the person, we'll navigate to person details. In Acme.PhoneBookDemo.Mobile.MAUI project, there's Pages folder. Add new folder named People in that folder. And create new razor page in it named Index.
Go to NavigationUrlConsts and add People
internal class NavigationUrlConsts
{
    public const string Index = "/";
    public const string Login = "Login";
    public const string SendTwoFactorCode = "SendTwoFactorCode";
    public const string Tenants = "Tenants";
    public const string User = "User";
    public const string Settings = "Settings";

+    public const string People = "People";
}
Then set your Index pages route using that.
Index.razor
@using Acme.PhoneBookDemo.Services.Navigation
@attribute [Route("/" + NavigationUrlConsts.People)]

<h3>Index</h3>
And inherit [YOURAPPNAME]MainLayoutPageComponentBase.
Index.razor
@using Acme.PhoneBookDemo.Services.Navigation
+@inherits AbpZeroTemplateMainLayoutPageComponentBase
@attribute [Route("/" + NavigationUrlConsts.People)]

<h3>Index</h3>
Index.razor.cs
using Acme.PhoneBookDemo.Mobile.MAUI.Shared;

public partial class Index: AbpZeroTemplateMainLayoutPageComponentBase
{
}
We have created an empty view. Lets fill it.
Index.razor.cs
//...
using Acme.PhoneBookDemo.Core.Dependency;
using Acme.PhoneBookDemo.Core.Threading;

namespace Acme.PhoneBookDemo.Mobile.MAUI.Pages.People;

public partial class Index : AbpZeroTemplateMainLayoutPageComponentBase
{
    protected IPersonAppService personAppService { get; set; }

    private GetAllPersonsInput _filter = new GetAllPersonsInput();

    private GetPersonForViewDto[] people;

    public Index()
    {
        personAppService = DependencyResolver.Resolve<IPersonAppService>();
    }

    protected override async Task OnInitializedAsync()
    {
        await SetPage(L("People"));
        await UserDialogsService.Block();
        await GetList();
    }

    private async Task GetList()
    {
        await SetBusyAsync(async () =>
        {
            await WebRequestExecuter.Execute(
                async () => await personAppService.GetAll(_filter),
                (result) => {
                    people = result.Items.ToArray();
                    StateHasChanged();
                    return Task.CompletedTask;
                });
        });
    }
}
Index.razor
@using Acme.PhoneBookDemo.Services.Navigation
@inherits AbpZeroTemplateMainLayoutPageComponentBase
@attribute [Route("/" + NavigationUrlConsts.People)]

<div class="row align-items-center mt-1 mb-2 m-0">
    <div class="col-xl-12">
        <div class="mb-5 align-items-center">
            <div class="input-group">
                <input type="text" class="form-control" @bind="_filter.Filter" placeholder="@L("SearchWithThreeDot")">
                <button @onclick="GetList" class="btn btn-primary" type="button">
                    <i class="fa fa-search" aria-label="Search"></i>
                </button>
            </div>
        </div>
    </div>
</div>
<div class="row m-0">
    <div class="col">
        <div class="card">
            <div class="card-body">
                @if (people != null)
                {
                    <div class="table-responsive">
                        <table class="table table-row-dashed align-middle gs-0 gy-3 my-0">
                            <thead>
                                <tr>
                                    <th class="text-center fw-bold">@L("Name")</th>
                                    <th class="text-center fw-bold">@L("Surname")</th>
                                    <th class="text-center fw-bold">@L("EmailAddress")</th>
                                    <th></th>
                                </tr>
                            </thead>
                            <tbody>
                                @foreach (var person in people)
                                {
                                    <tr>
                                        <td class="text-center">@person.Person.Name</td>
                                        <td class="text-center">@person.Person.Surname</td>
                                        <td class="text-center">@person.Person.EmailAdress</td>
                                    </tr>
                                }
                            </tbody>
                        </table>
                    </div>
                }
            </div>
        </div>
    </div>
</div>
Adding People Page to Navigation Menu
To add a new menu item, open MenuProvider class in Services/Navigation folder.
Add the new NavigationMenuItem in the list like below:
public class MenuProvider : ISingletonDependency, IMenuProvider
{
    private List<NavigationMenuItem> _menuItems = new List<NavigationMenuItem>
    {
        new NavigationMenuItem
        {
            Title = L.Localize("Tenants"),
            Icon = "fa-solid fa-list",
            NavigationUrl = NavigationUrlConsts.Tenants,
            RequiredPermissionName = PermissionKey.Tenants,
        },
        new NavigationMenuItem
        {
            Title = L.Localize("Users"),
            Icon = "fa-solid fa-filter",
            NavigationUrl= NavigationUrlConsts.User,
            RequiredPermissionName = PermissionKey.Users,
        },
        new NavigationMenuItem
        {
            Title = L.Localize("People"),
            Icon = "fa-solid fa-user",
            NavigationUrl  = NavigationUrlConsts.People,
            RequiredPermissionName = PermissionKey.Phonebook
        },
        new NavigationMenuItem
        {
            Title = L.Localize("MySettings"),
            Icon = "fa-solid fa-cog",
            NavigationUrl  = NavigationUrlConsts.Settings
        }
    };
}
Let's set the properties of the new NavigationMenuItem:
Title: It's already localized in the Developing Step By Step document. We just set localization key with this shortcut: L.Localize("PhoneBook"). And it localizes the menu text.
Icon: Icon for menu
NavigationUrl: Url to go to the page
RequiredPermissionName: A permission key has to be assigned to be able to show/hide the new menu according to the user's permission. In the previous document, it's already declared in "Define the permission" section as "Pages.Tenant.PhoneBook". We need to use the same string for permission key. So what you have to do is add the below line to PermissionKey class like below:
public const string Phonebook = "Pages.Tenant.PhoneBook";
Let's run the application to see the new menu item.
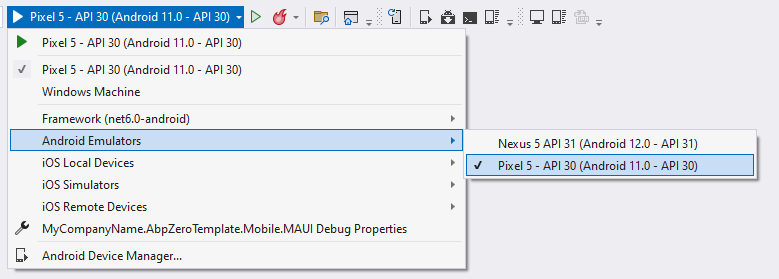
In this example, we'll use Android platform to test the sample. Hence, set the startup project to Acme.PhoneBookDemo.Mobile.MAUI and .
If you've already started Android emulator, you can directly run the project. But if you've not started the emulator yet, it's advised to start the emulator first from the Visual Studio Toolbar as shown below. The reason of initializing emulator is: sometimes Visual Studio cannot make initial connection to the emulator for the first run. So it's better to run it and wait until it starts up successfully. When you see the emulator home screen, you can run the project (F5).
You will see a loading animation screen while initializing. After that you'll see the app login page. The PhoneBook is defined on tenant side. You have to switch to a tenant to see the PhoneBook menu item. Tap Switch Tenant button and enter default into the textbox in the opened modal. If the tenant default is available, you will see "Current Tenant: default" label. If the tenant is not active or does not exist, then you'll get an alert about that.
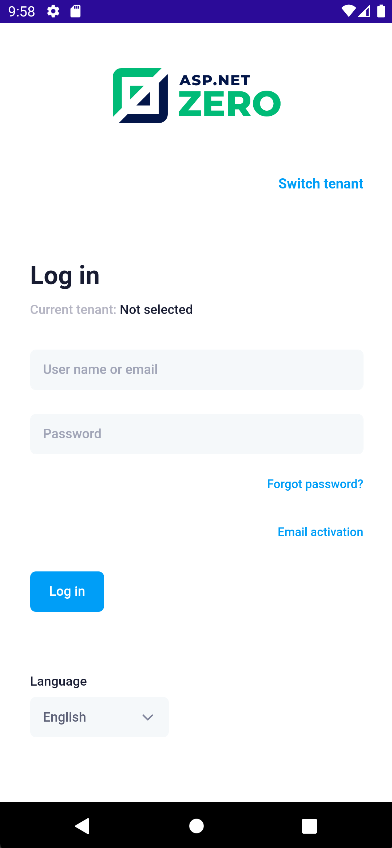
Enter your credentials and tap Log In button. When you successfully login, you can see the below screen with new People menu item.
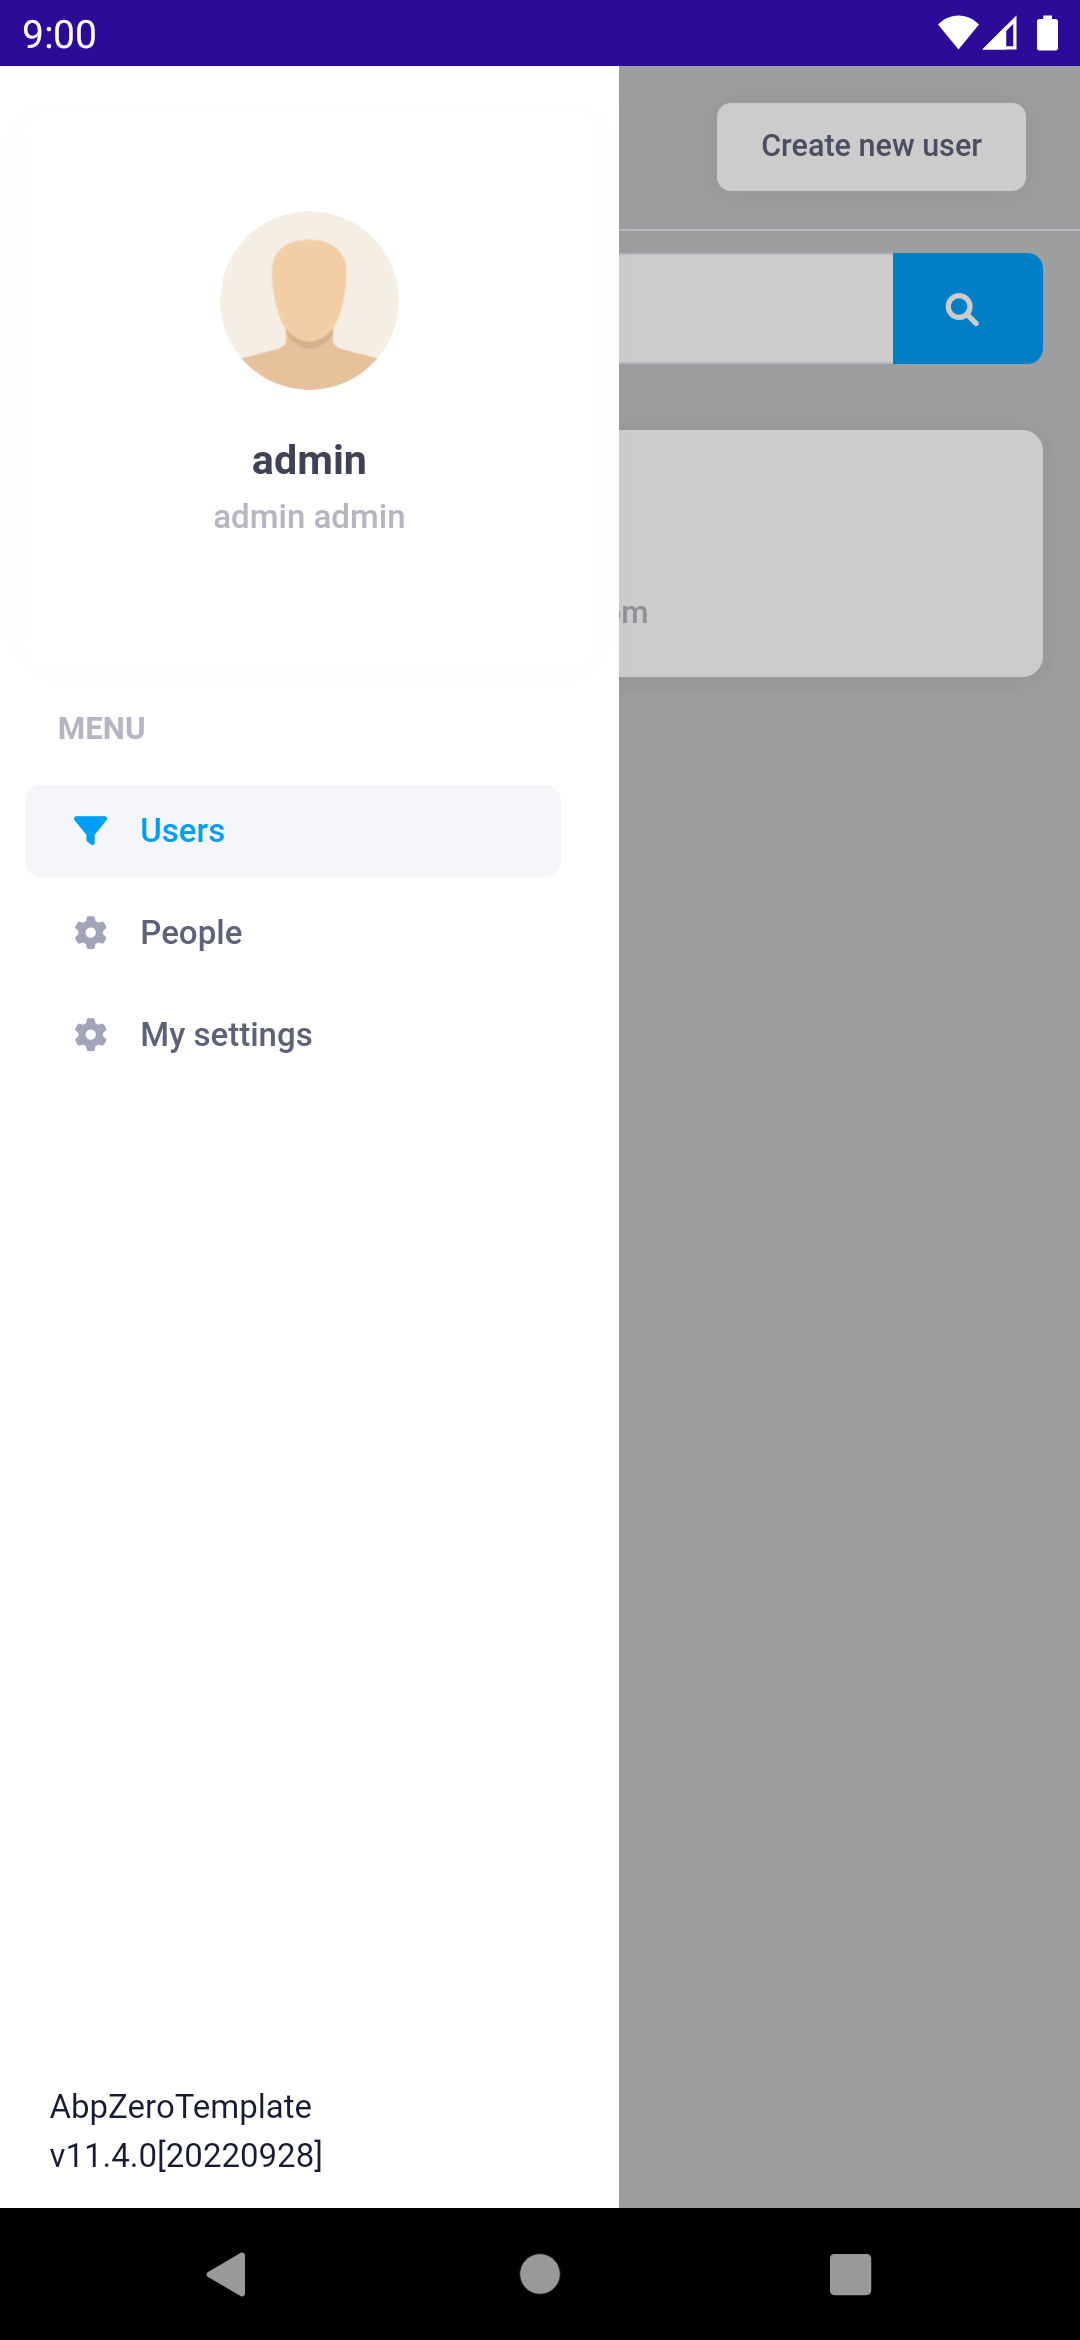
Up to here we successfully added an empty People page. Let's populate the view with data.
Creating Or Editing People Modal
Let's go to the Pages/People and add new razor page named CreateOrEditPersonModal. And fill it with following code parts
CreateOrEditPersonModal.razor.cs
using Acme.PhoneBookDemo.Mobile.MAUI.Shared;

namespace Acme.PhoneBookDemo.Mobile.MAUI.Pages.People;

public partial class CreateOrEditPersonModal : ModalBase
{
    public override string ModalId => "create-or-edit-person";

    [Parameter] public EventCallback OnSave { get; set; }

    CreateOrEditPersonDto createOrEditPersonDto;

    protected IPersonAppService personAppService { get; set; }

    bool _isInitialized = false;

    public CreateOrEditPersonModal()
    {
        personAppService = DependencyResolver.Resolve<IPersonAppService>();
    }

    public async Task Open(int? personId = null)
    {
        await SetBusyAsync(async () =>
        {
            if (personId.HasValue)
            {
                await WebRequestExecuter.Execute(
                    async () => await personAppService.GetPersonForEdit(new EntityDto(personId.Value)),
                    async (person) =>
                    {
                        createOrEditPersonDto = person.Person;

                        _isInitialized = true;
                        await Show();//shows modal
                    }
                );
            }
            else
            {
                createOrEditPersonDto = new CreateOrEditPersonDto();
                _isInitialized = true;
                await Show();//shows modal
            }
        });
    }

    private async Task Save()
    {
        await SetBusyAsync(async () =>
        {
            await WebRequestExecuter.Execute(
                    async () => await personAppService.CreateOrEdit(createOrEditPersonDto),
                    async () =>
                    {
                        _isInitialized = false;
                        createOrEditPersonDto = null;

                        await UserDialogsService.AlertSuccess(L("SuccessfullySaved"));
                        await Hide();
                        await OnSave.InvokeAsync();
                    }
                );
        });

    }
}
ASP.NET Zero provides you a built-in base classes that help you while you developing MAUI apps. With using ModalBase class you can easly access to the modal in DOM and show and hide it. Since modal implementation is javascript based, ASP.NET Zero implements proxy classes that calls javascript apis for managing modals. See Services/UI/ModalManagerService.cs
CreateOrEditPersonModal.razor
@inherits ModalBase

<!--begin::Modal - New Target-->
<div class="modal fade" id="@ModalId" tabindex="-1" aria-hidden="true">
    <!--begin::Modal dialog-->
    <div class="modal-dialog modal-dialog-centered">
        <!--begin::Modal content-->
        <div class="modal-content rounded">
            <!--begin::Modal body-->
            <div class="modal-body scroll-y pt-10 pb-10">
                @if (_isInitialized)
                {
                      <!--begin::Heading-->
                    <div class="mb-13 text-center">
                        @if (createOrEditPersonDto.Id.HasValue)
                        {
                            <!--begin::Title-->
                            <h1 class="mb-3">@L("EditPerson")</h1>
                            <!--end::Title-->
                        }else
                        {
                            <!--begin::Title-->
                            <h1 class="mb-3">@L("CreateNewPerson")</h1>
                            <!--end::Title-->
                        }
                    </div>
                    <!--end::Heading-->
                    <!--begin::Input group-->
                    <div class="d-flex flex-column mb-8 fv-row fv-plugins-icon-container ">
                        <!--begin::Label-->
                        <label class="d-flex align-items-center fs-6 fw-semibold mb-2">
                            <span class="required">
                                @L("Name")
                            </span>
                            <i class="fas fa-exclamation-circle ms-2 fs-7"></i>
                        </label>
                        <!--end::Label-->
                        <input type="text" class="form-control form-control-solid" @bind="createOrEditPersonDto.Name" />
                    </div>
                    <!--end::Input group-->
                    <!--begin::Input group-->
                    <div class="d-flex flex-column mb-8 fv-row fv-plugins-icon-container min-w-90">
                        <!--begin::Label-->
                        <label class="d-flex align-items-center fs-6 fw-semibold mb-2">
                            <span class="required">
                                @L("Surname")
                            </span>
                            <i class="fas fa-exclamation-circle ms-2 fs-7"></i>
                        </label>
                        <!--end::Label-->
                        <input type="text" class="form-control form-control-solid" @bind="createOrEditPersonDto.Surname" />
                    </div>
                    <!--end::Input group-->
                    <!--begin::Input group-->
                    <div class="d-flex flex-column mb-8 fv-row fv-plugins-icon-container min-w-90">
                        <!--begin::Label-->
                        <label class="d-flex align-items-center fs-6 fw-semibold mb-2">
                            <span class="required">
                                @L("EmailAddress")
                            </span>
                            <i class="fas fa-exclamation-circle ms-2 fs-7"></i>
                        </label>
                        <!--end::Label-->
                        <input type="text" class="form-control form-control-solid" @bind="createOrEditPersonDto.EmailAdress" />
                    </div>
                    <!--end::Input group-->
                    <!--begin::Actions-->
                    <div class="text-center mt-8">
                        <button type="reset" data-dismiss="modal" class="btn btn-light me-3" @onclick="Hide">@L("Cancel")</button>
                        <button type="button" class="btn btn-primary" @onclick="Save">
                            <span class="indicator-label">@L("Save")</span>
                        </button>
                    </div>
                    <!--end::Actions-->
                }
            </div>
            <!--end::Modal body-->
        </div>
        <!--end::Modal content-->
    </div>
    <!--end::Modal dialog-->
</div>
<!--end::Modal - New Target-->
Now we can use that modal to create or edit person. Let's go to the Index.razor of people and add that modal.
Index.razor.cs
public partial class Index : AbpZeroTemplateMainLayoutPageComponentBase
{
    protected IPersonAppService personAppService { get; set; }
+    protected IPermissionService PermissionService { get; set; }

    private GetAllPersonsInput _filter = new GetAllPersonsInput();

    private GetPersonForViewDto[] people;

    private CreateOrEditPersonModal createOrEditPersonModal { get; set; }

+    private bool _hasEditPermission;
+    private bool _hasCreatePermission;

    public Index()
    {
        personAppService = DependencyResolver.Resolve<IPersonAppService>();
+        PermissionService = DependencyResolver.Resolve<IPermissionService>();

+        _hasEditPermission = PermissionService.HasPermission(PermissionKey.PhoneBook.EditPerson);
+        _hasCreatePermission = PermissionService.HasPermission(PermissionKey.PhoneBook.CreatePerson);
    }

    protected override async Task OnInitializedAsync()
    {
+        if (_hasCreatePermission)
+        {
+            await SetPage(L("People"), L("CreateNewPerson"), OpenCreatePersonModal);
+        }
+        else
+        {
+            await SetPage(L("People"));
+        }

        await GetList();
    }

    private async Task GetList()
    {
        await SetBusyAsync(async () =>
        {
            await WebRequestExecuter.Execute(
                async () => await personAppService.GetAll(_filter),
                (result) => {
                    people = result.Items.ToArray();
                    StateHasChanged();
                    return Task.CompletedTask;
                });
        });
    }

+    private async Task OpenCreatePersonModal()
+    {
+        await createOrEditPersonModal.Open();
+    }
+
+    private async Task EditPerson(int personId)
+    {
+        await createOrEditPersonModal.Open(personId);
+    }
}
And add modal at the end of your Index.razor.
Index.razor
<CreateOrEditPersonModal OnSave="GetList" @ref="createOrEditPersonModal"></CreateOrEditPersonModal>
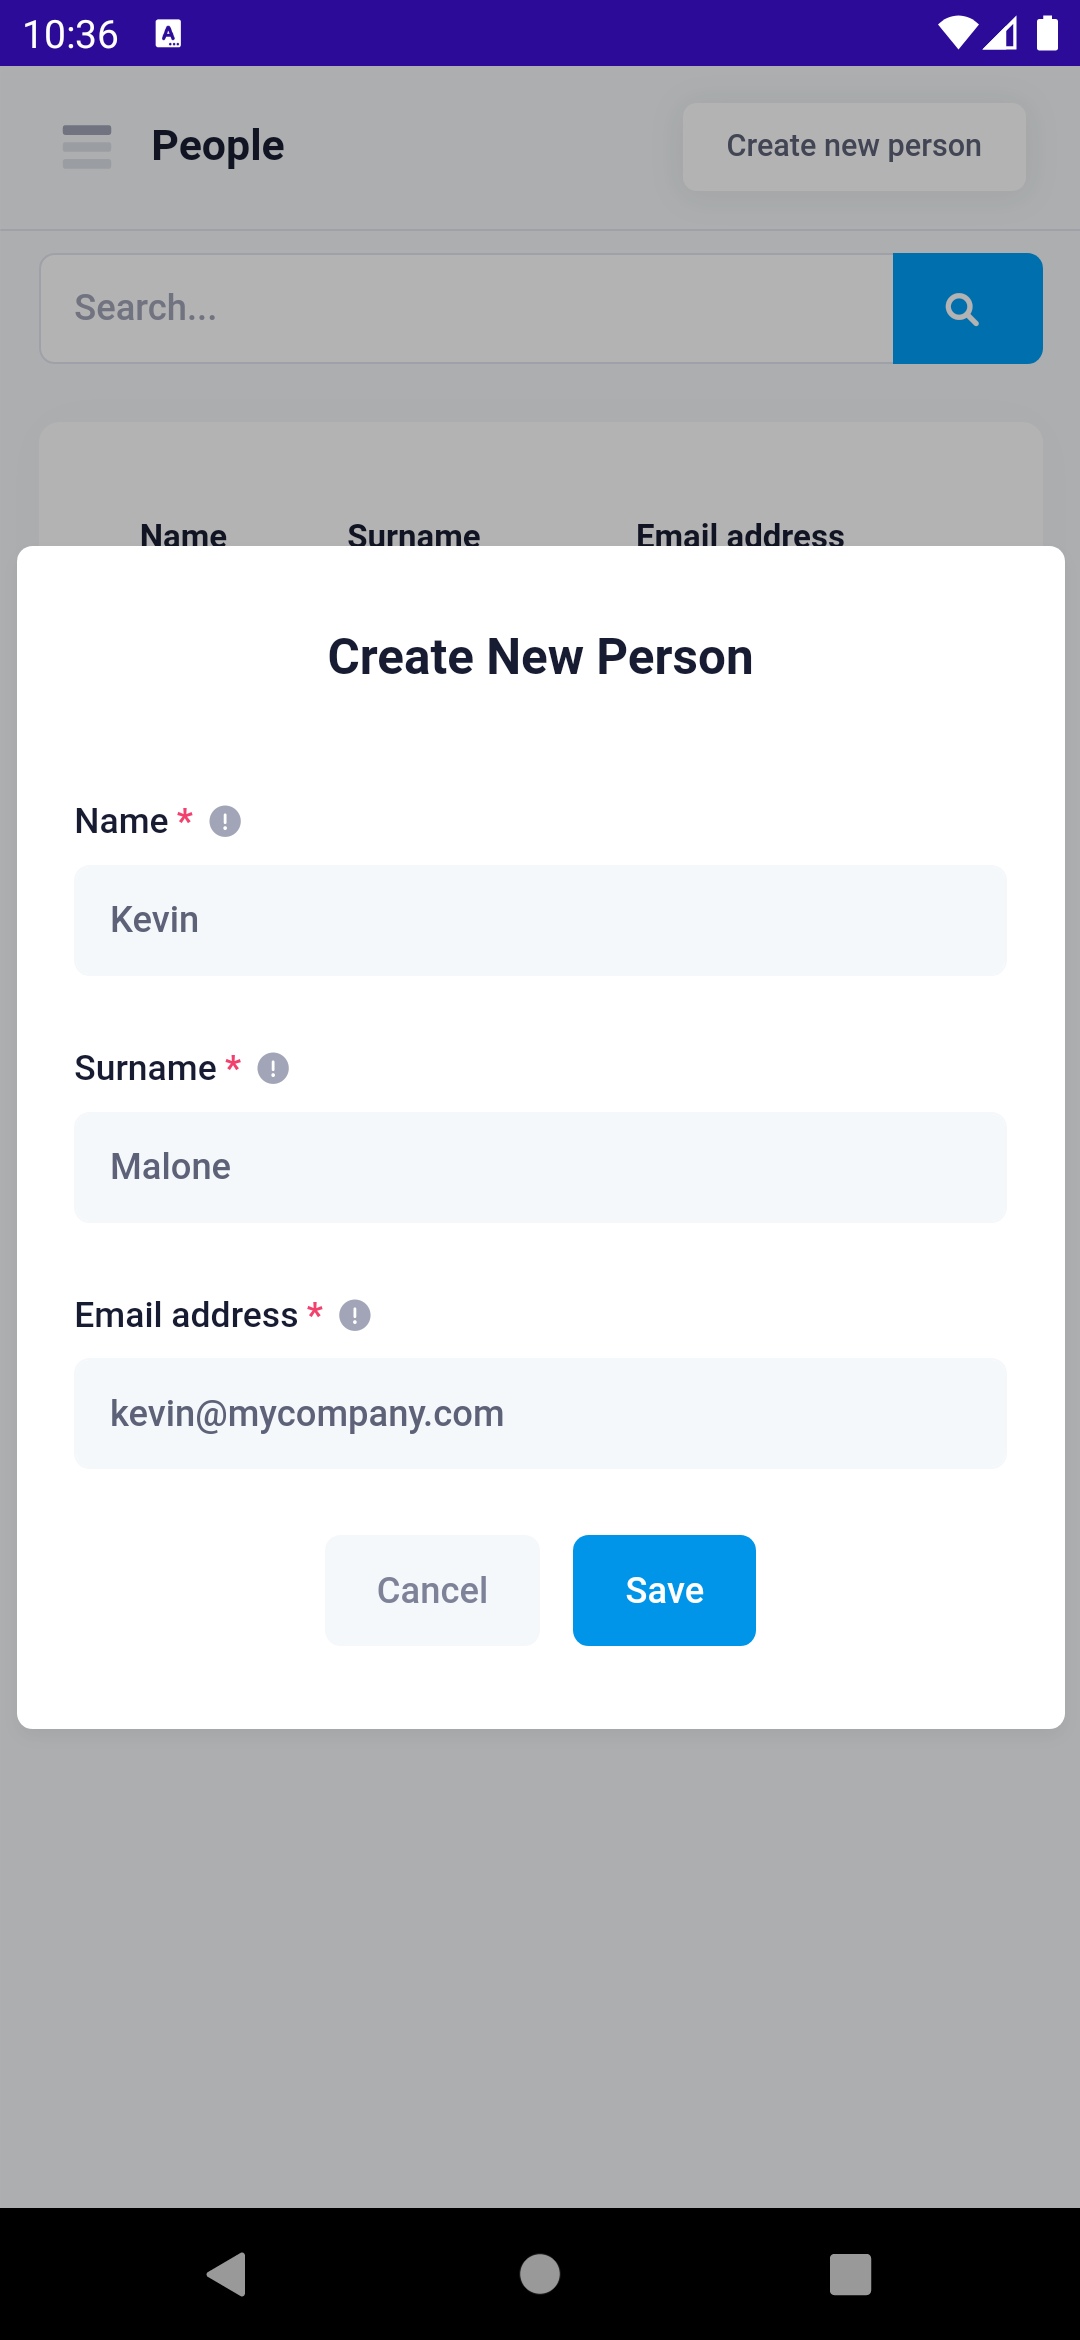
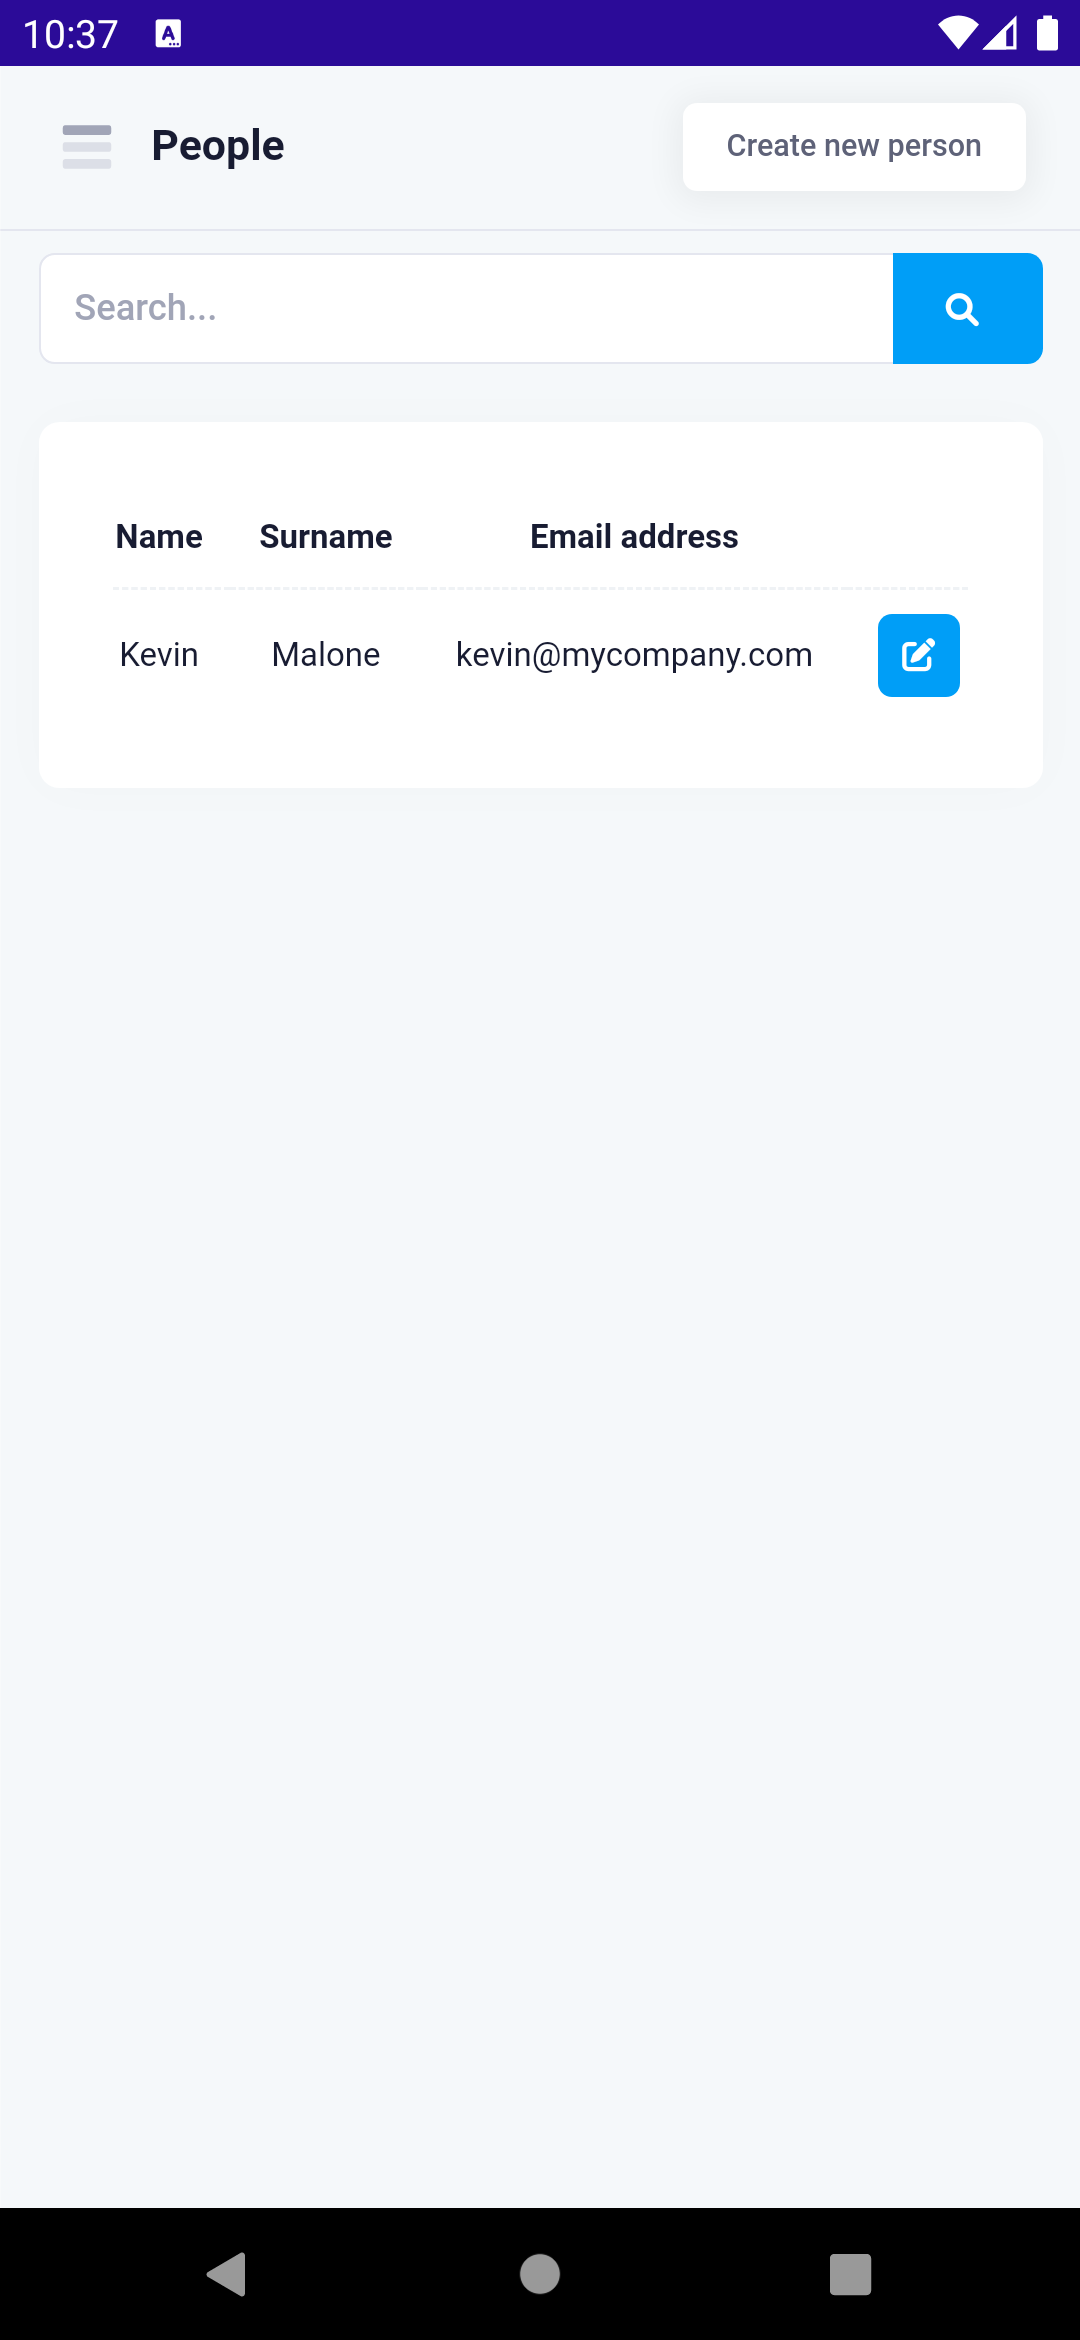
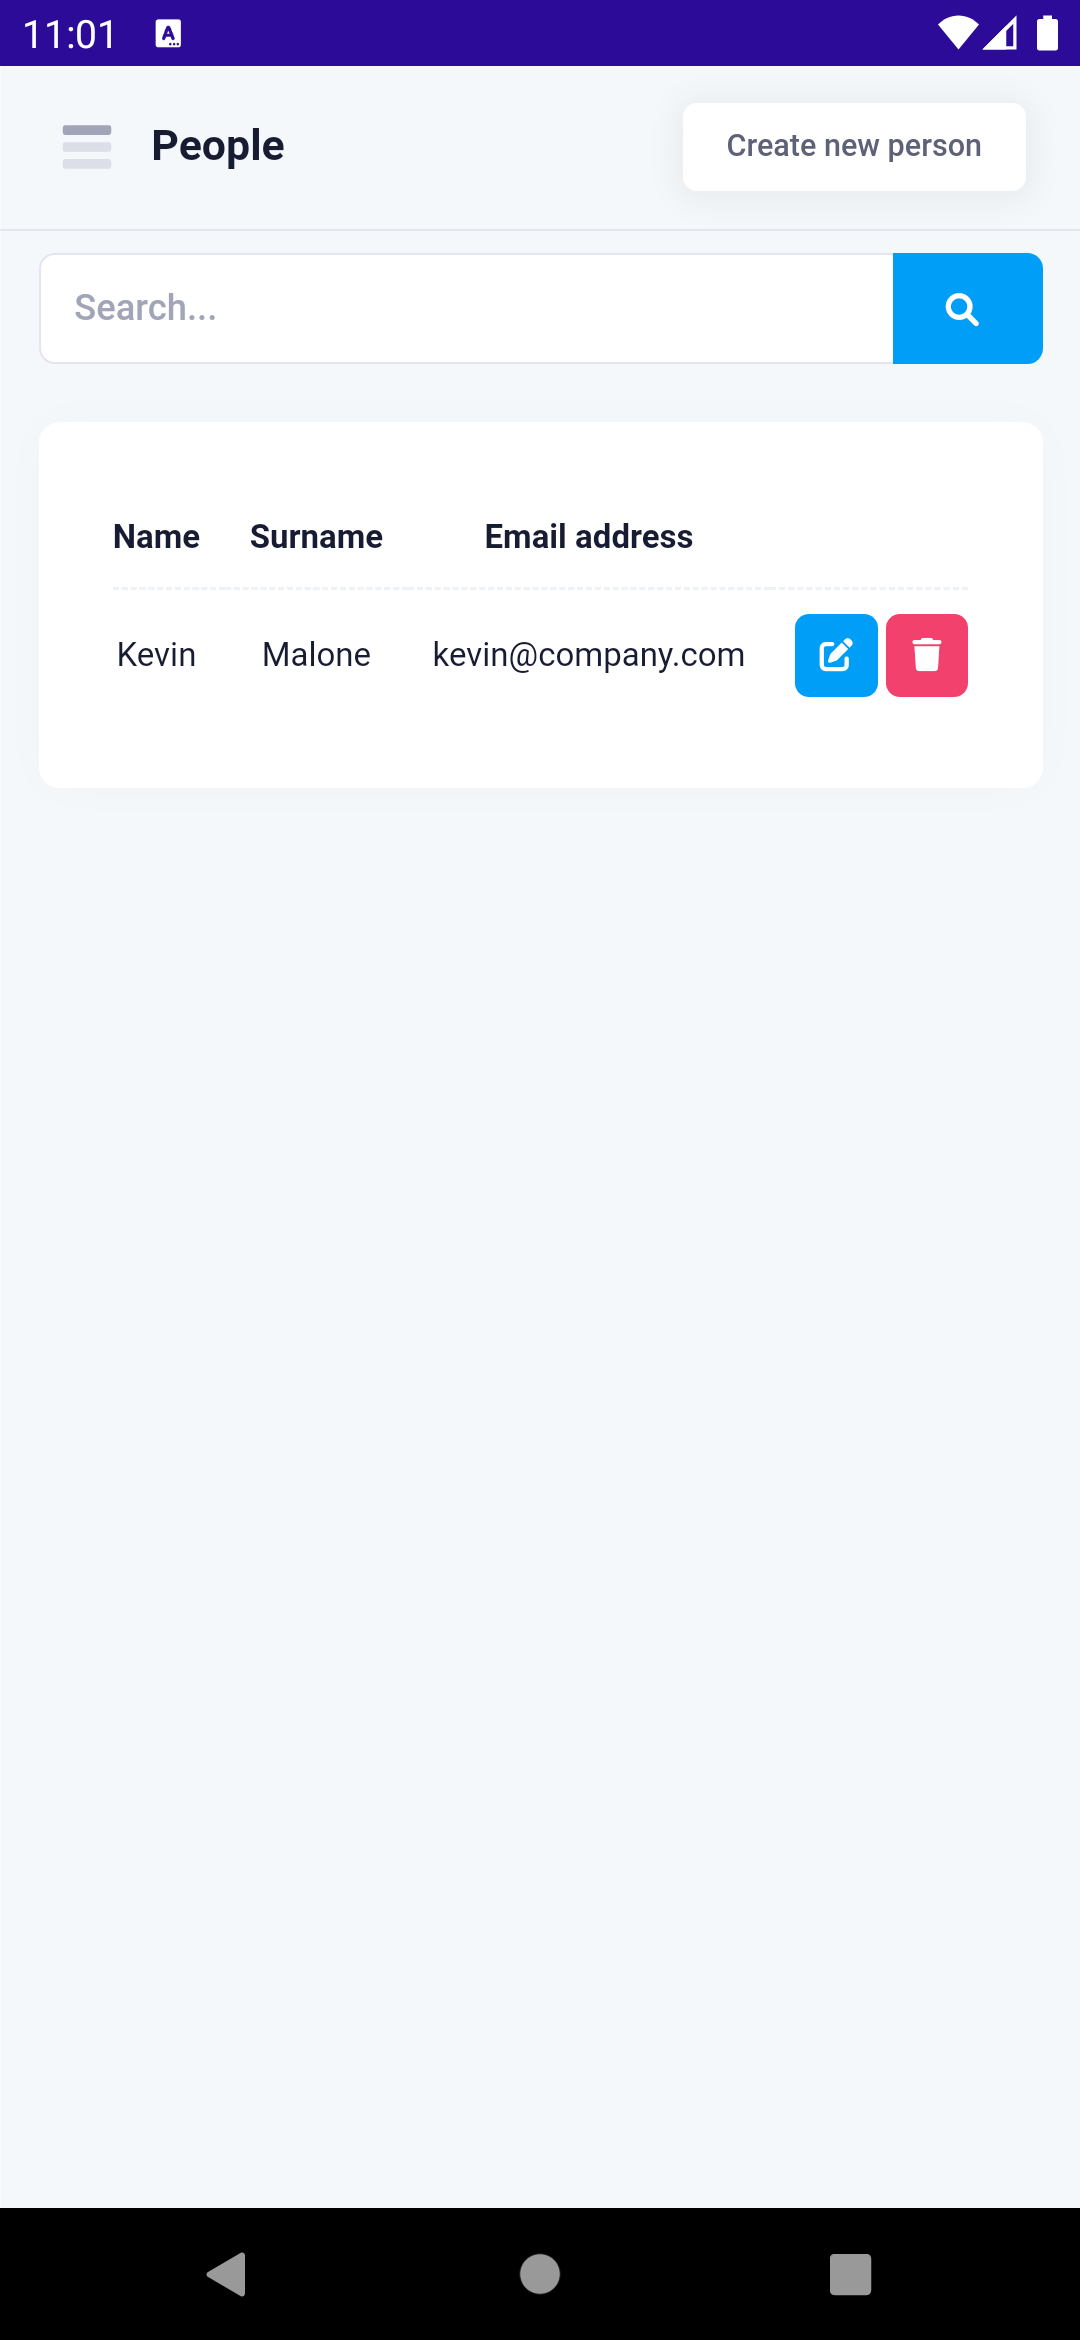
Now you can create person, list it and edit it.
Create Person
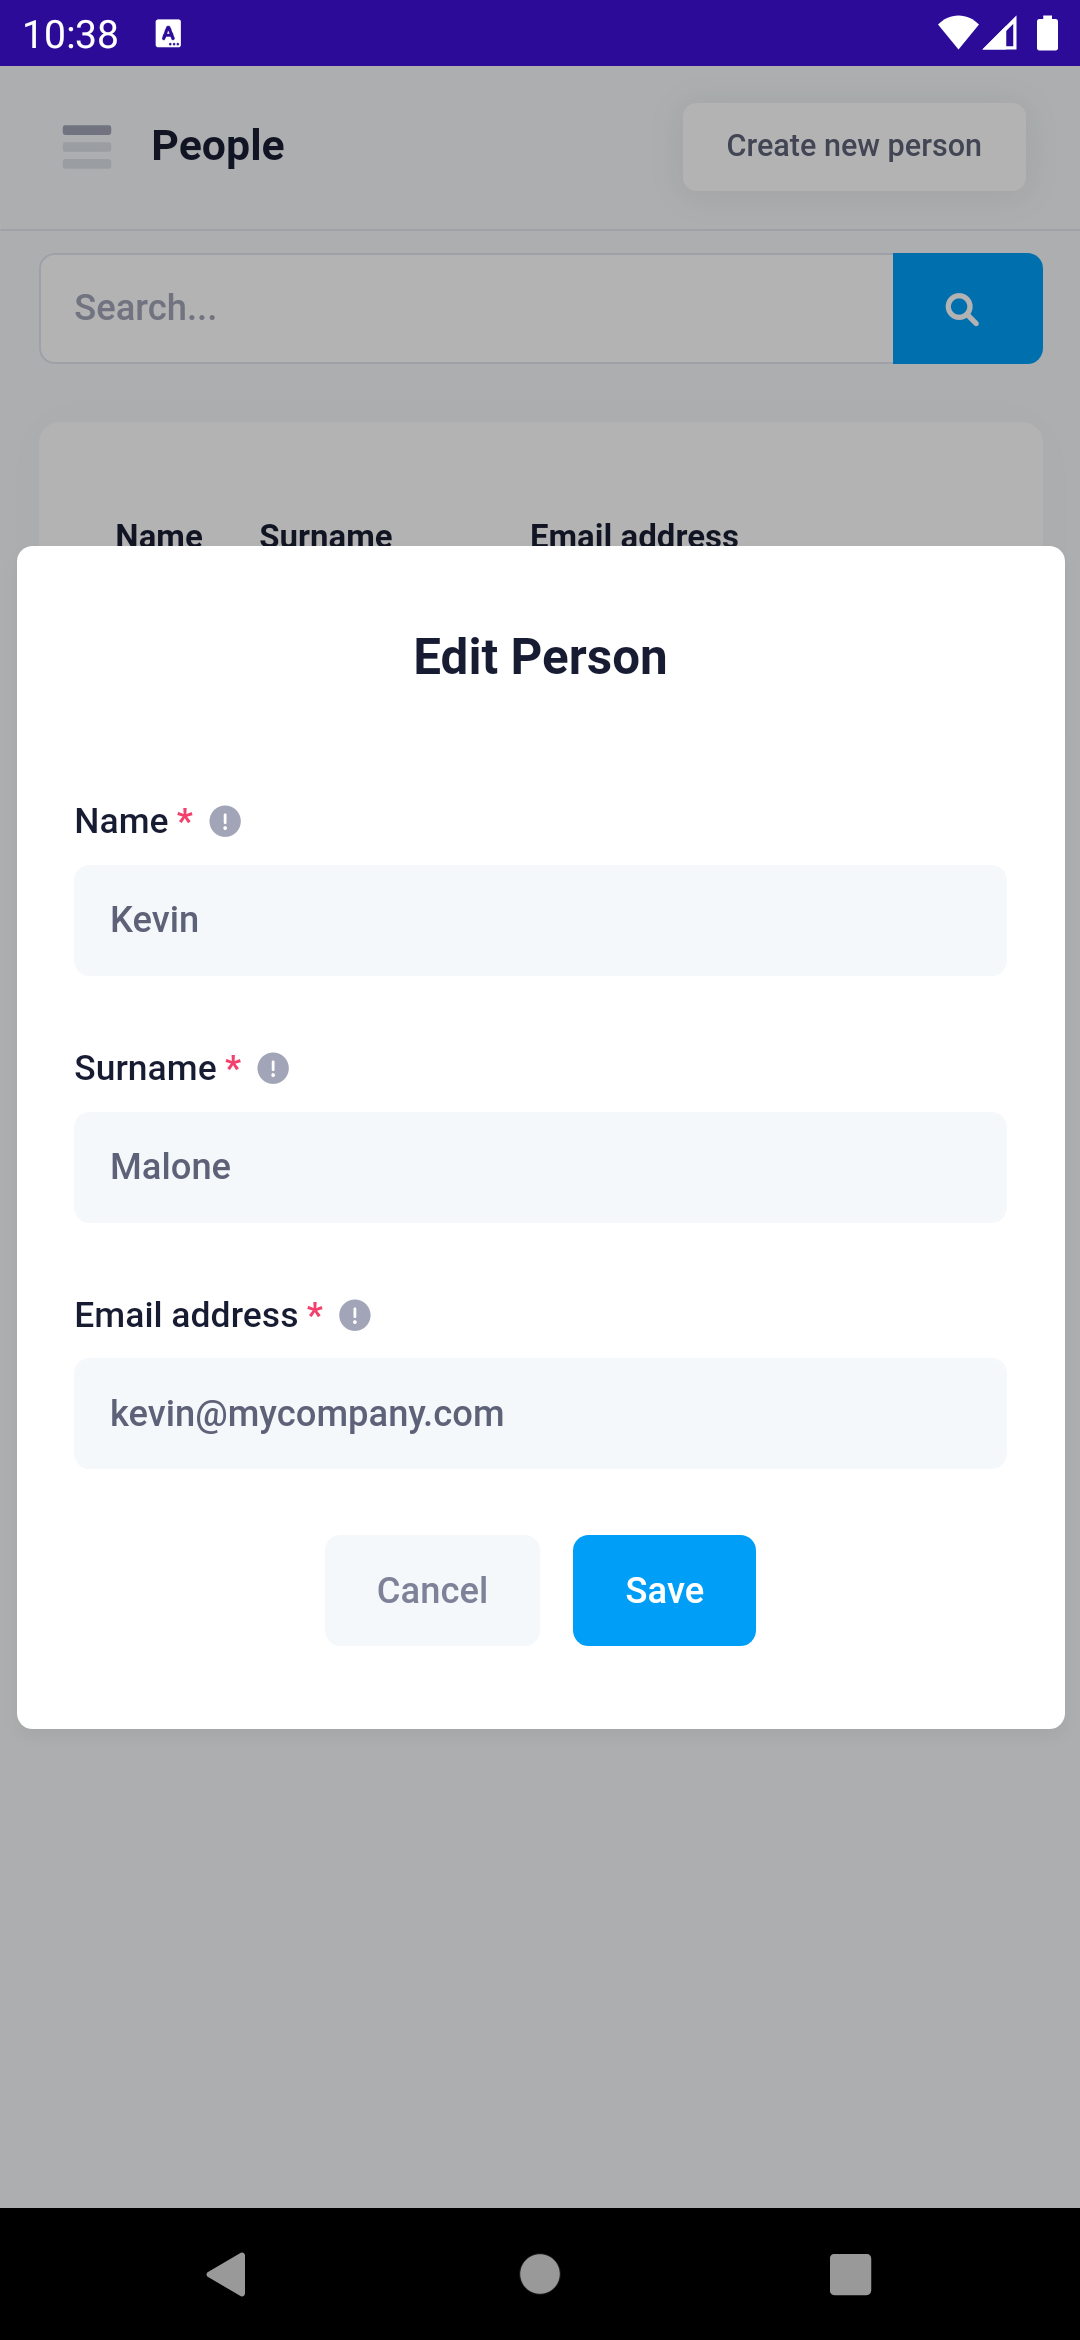
List Person
Edit Person
Deleting Person
Adding delete person is much more easier. We can use sweetalert
Add the delete permission key in PermissionKey.cs.
public const string PhoneBookDeletePerson = "Pages.Tenant.PhoneBook.DeletePerson";We'll place a delete button inside the person list.
Index.razor.cs
private bool _hasDeletePermission;

public Index()
{
    //...
    _hasDeletePermission = PermissionService.HasPermission(PermissionKey.PhoneBook_DeletePerson);
}

//...
private async Task DeletePerson(PersonDto person)
{
    var isConfirmed = await UserDialogsService.Confirm(L("PersonDeleteWarningMessage", "\"" + person.Name + "\""), L("AreYouSure"));
    if (isConfirmed)
    {
        await SetBusyAsync(async () =>
        {
            await WebRequestExecuter.Execute(
                async () => await personAppService.Delete(new EntityDto(person.Id)),
                async () =>
                {
                    await GetList();
                }
            );
        });
    }
}
Index.razor
@foreach (var person in people)
{
    <tr>
        <td class="text-center">@person.Person.Name</td>
        <td class="text-center">@person.Person.Surname</td>
        <td class="text-center">@person.Person.EmailAdress</td>
        <td>
+            @if (_hasDeletePermission)
+            {
+                <button class="float-end btn btn-sm btn-icon btn-primary w-30px h-30px" @onclick="(()=>DeletePerson(person.Person))">
+                    <i class="fa fa-trash"></i>
+                </button>
+            }
            @if (_hasEditPermission)
            {
                <button class="float-end btn btn-sm btn-icon btn-primary w-30px h-30px me-1" @onclick="(()=>EditPerson(person.Person.Id))">
                    <i class="fa fa-edit"></i>
                </button>
            }
        </td>
    </tr>
}
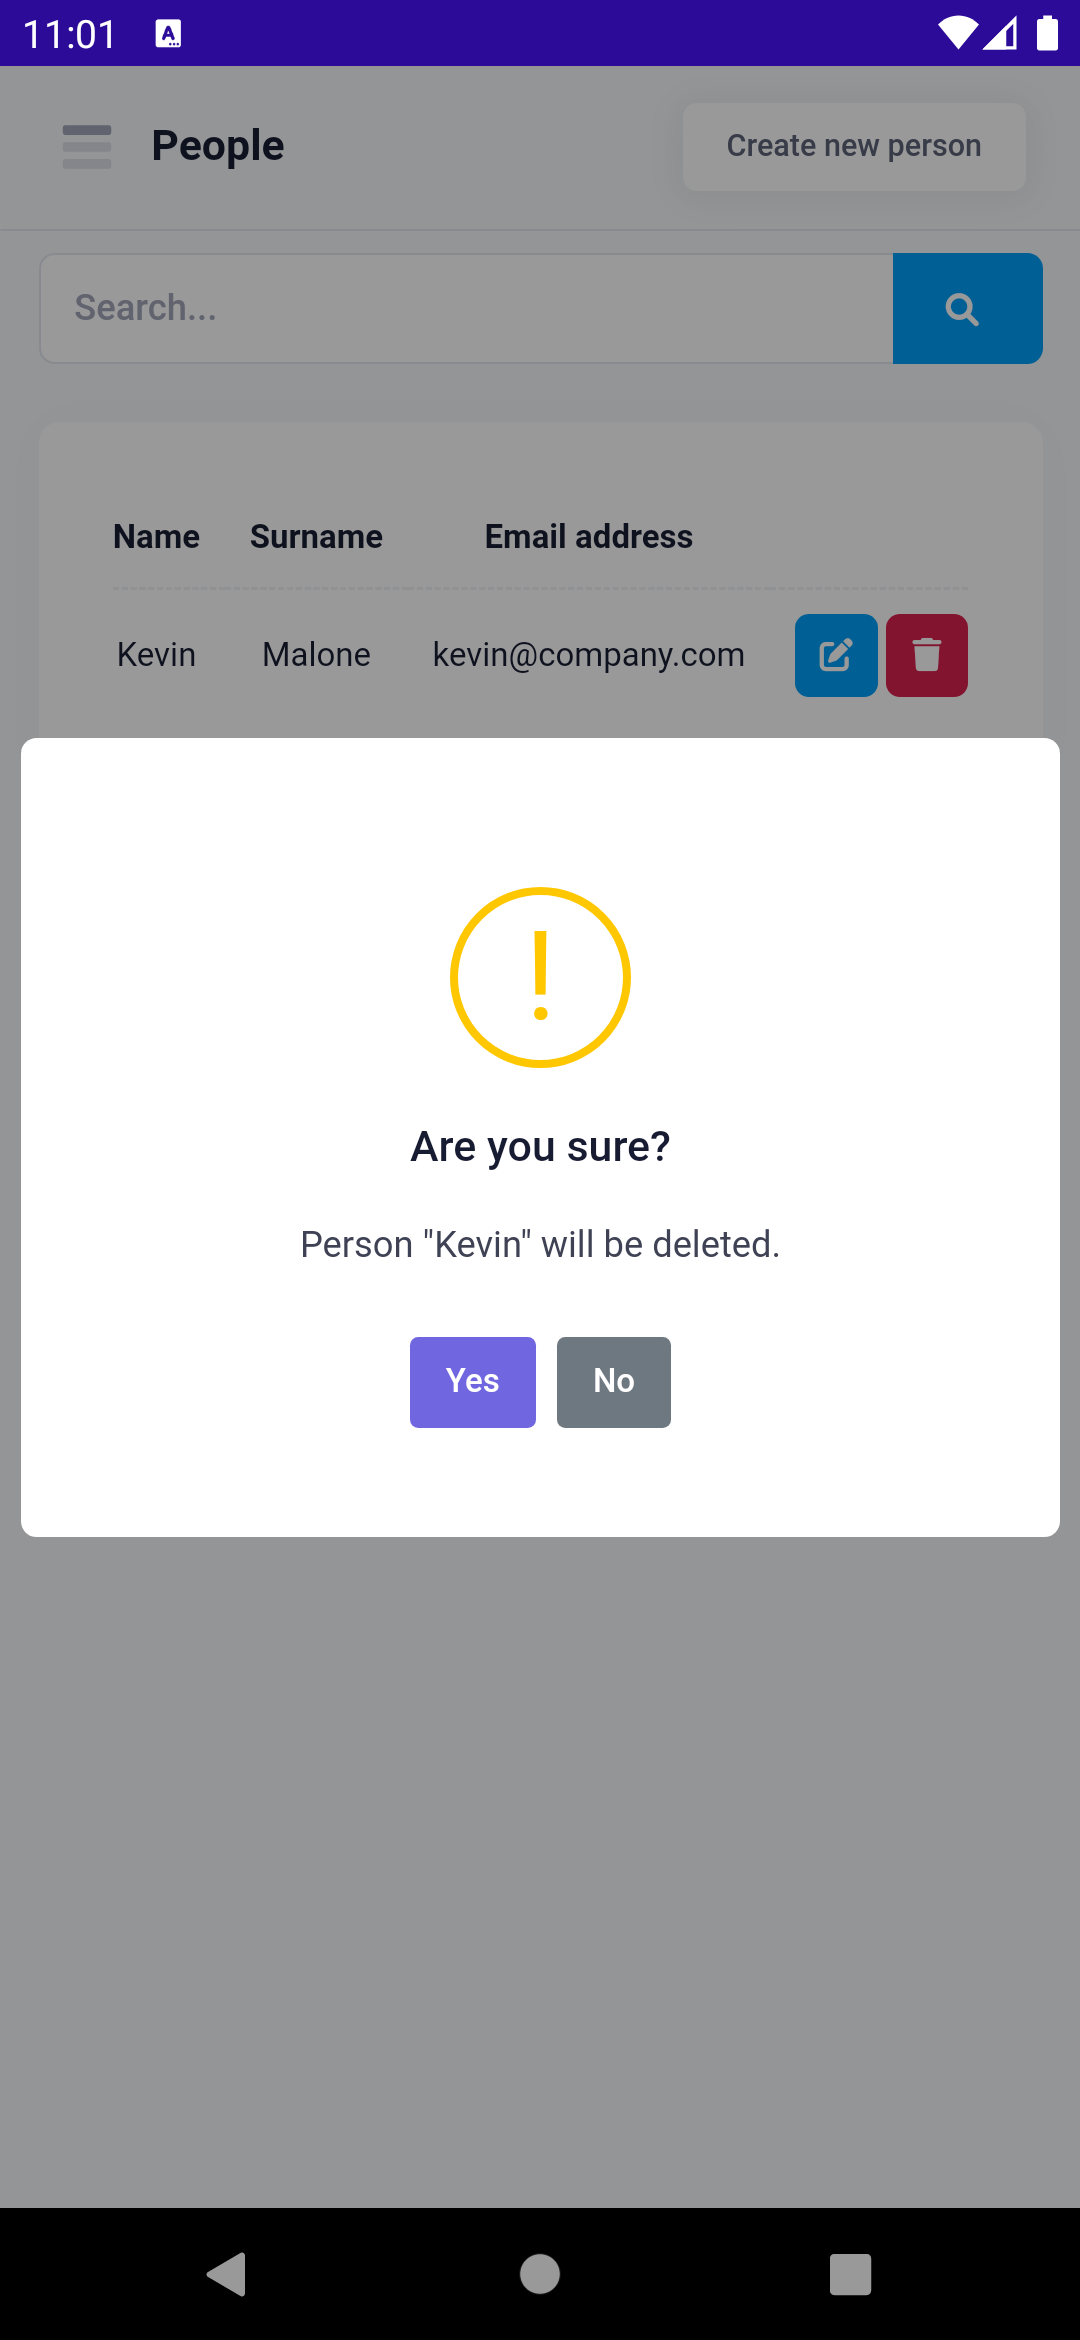
Delete button
Delete confirmation
Conclusion
In this document, we built a complete example that covers most parts of the ASP.NET Zero MAUI development. We intentionally used different approaches for similar tasks to show you different styles of development. ASP.NET Zero provides an architecture, but does not restrict you. You can decide on your own style of development.
Source Code
You should purchase ASP.NET Zero in order to get source
code. After purchasing, you can get the sample project from the private
GitHub repository: https://github.com/aspnetzero/aspnet-zero-samples/tree/master/PhoneBook-Core