logo
Project
Version

File Upload Tutorial

Uploading a file in an ASP.NET Zero application is not different than a regular ASP.NET Core application. In this tutorial, we will implement a file upload functionality in ASP.NET Zero. We will also send an additional field to server while uploading a file.

This tutorial assumes that, you already have a valid ASP.NET Zero license and already created an empty project by following Getting Started document.

You can implement two different way of file upload to MVC projects. Ajax based implementation and form based implementation.

Form Based Implementation

  • First, create a class named FileUploadViewModel in *.Web.Mvc\Areas\AppAreaName\Models folder. This class will be used to transfer additional parameters during the upload process.
using Microsoft.AspNetCore.Http;
public class FileUploadImageViewModel
{
    public string Description { get; set; }
    
    public IFormFile Image { get; set; }
}
  • Then, create a controller named FileUploadController in *.Web.Mvc\Areas\AppAreaName\Controllers folder.
[Area("AppAreaName")]
[AbpMvcAuthorize(AppPermissions.Pages_FileUpload)]
public class FileUploadController : AbpZeroTemplateControllerBase
{
    private readonly IHostEnvironment _env;
    public FileUploadController(IHostEnvironment env)
    {
        _env = env;
    }
    
    public IActionResult Index()
    {
        return View();
    }
    
    [HttpPost]
    public async Task<IActionResult> Index(FileUploadViewModel model)
    {
        var uniqueFileName = GetUniqueFileName(model.Image.FileName);
        var dir = Path.Combine(_env.ContentRootPath, "Images");
        if (!Directory.Exists(dir))
        {
            Directory.CreateDirectory(dir);
        }
        var filePath = Path.Combine(dir, uniqueFileName);
        await model.Image.CopyToAsync(new FileStream(filePath, FileMode.Create));
        return View();
    }
    
    private string GetUniqueFileName(string fileName)
    {
        fileName = Path.GetFileName(fileName);
        return Path.GetFileNameWithoutExtension(fileName)
               + "_"
               + Guid.NewGuid().ToString().Substring(0, 4)
               + Path.GetExtension(fileName);
    }
    
    private void SaveImagePathToDb(string description, string filepath)
    {
        //todo: description and file path to db
    }
}
  • Create a cshtml file named Index.cshtml in *.Web.Mvc\Areas\AppAreaName\Views\FileUpload folder.
<div class="content d-flex flex-column flex-column-fluid">
    <abp-page-subheader title="@L("FileUpload")">
    </abp-page-subheader>

    <div class="@(await GetContainerClass())">
        <div class="card card-custom gutter-b">
            <div class="card-body">
                <form asp-action="Index" enctype="multipart/form-data">
                   <div class="form-group">
                        <label for="Description">@L("Description")</label>
                        <input class="form-control" type="text" id="Description" name="Description" required>
                    </div>

                    <div class="form-group">
                        <label for="Image">@L("Image")</label>
                        <input class="form-control" type="file" id="Image" name="Image" required>
                    </div>
                    <button type="submit" class="btn btn-light-primary font-weight-bold close-button">@L("Upload")</button>
                </form>
            </div>
        </div>
    </div>
</div>
  • Go to *.Web.Mvc\Areas\AppAreaName\Startup\AppAreaNameNavigationProvider.cs and add a new menu item.

    .AddItem(new MenuItemDefinition(
        AppAreaNamePageNames.FileUpload,
        L("FileUpload"),
        url: "AppAreaName/FileUpload",
        icon: "flaticon-file-1",
        permissionDependency: new SimplePermissionDependency(AppPermissions.Pages_FileUpload)
        )
    )
    
  • Then you will have a file upload page as seen below.

file-upload-tutorial-page-result

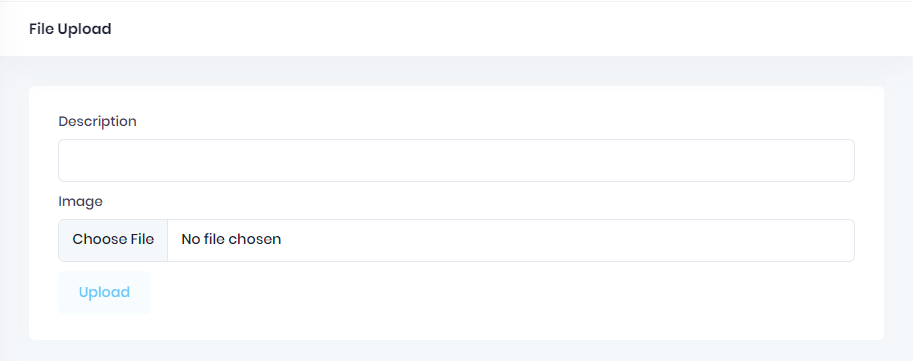
After you fill the description area, select a file and click to upload, you will see that it refreshes the page. Not to refresh page you can use ajax to upload file.

Ajax Based Implementation

  • First, create a class named FileUploadViewModel in *.Web.Mvc\Areas\AppAreaName\Models folder. This class will be used to transfer additional parameters during the upload process.
public class FileUploadImageViewModel
{
    public string Description { get; set; }
}
  • Then, create a controller named FileUploadController in *.Web.Mvc\Areas\AppAreaName\Controllers folder.
[Area("AppAreaName")]
[AbpMvcAuthorize(AppPermissions.Pages_FileUpload)]
public class FileUploadController : AbpZeroTemplateControllerBase
{
    private readonly IHostEnvironment _env;
    public FileUploadController(IHostEnvironment env)
    {
        _env = env;
    }
    
    public IActionResult Index()
    {
        return View();
    }
    
    [HttpPost]
    public async Task<string> UploadFile(FileUploadViewModel model)
    {
       	var image = Request.Form.Files.First();
        var uniqueFileName = GetUniqueFileName(image.FileName);
        var dir = Path.Combine(_env.ContentRootPath, "Images");
        if (!Directory.Exists(dir))
        {
            Directory.CreateDirectory(dir);
        }
        var filePath = Path.Combine(dir, uniqueFileName);
        await image.CopyToAsync(new FileStream(filePath, FileMode.Create));
        SaveImagePathToDb(input.Description, filePath);
        return uniqueFileName;
    }
    
    private string GetUniqueFileName(string fileName)
    {
        fileName = Path.GetFileName(fileName);
        return Path.GetFileNameWithoutExtension(fileName)
               + "_"
               + Guid.NewGuid().ToString().Substring(0, 4)
               + Path.GetExtension(fileName);
    }
    
    private void SaveImagePathToDb(string description, string filepath)
    {
        //todo: description and file path to db
    }
}
  • Create a cshtml file named Index.cshtml in *.Web.Mvc\Areas\AppAreaName\Views\FileUpload folder.
 @section Scripts{
     <script>
       $('#fileUploadForm').ajaxForm({      
          success: function (response) {
              if (response.success) {
                  //you can get result and use it now.
                  abp.message.success(app.localize("FileSavedSuccessfully", response.result));                  
              } else {
                  abp.message.error(response.error.message);
              }
          }
      });
     </script>
 }
<div class="content d-flex flex-column flex-column-fluid">
    <abp-page-subheader title="@L("FileUpload")">
    </abp-page-subheader>

    <div class="@(await GetContainerClass())">
        <div class="card card-custom gutter-b">
            <div class="card-body">
                <form id="fileUploadForm" enctype="multipart/form-data" method="post" action="UploadFile">
                    <div class="form-group">
                        <label for="Description">@L("Description")</label>
                        <input class="form-control" type="text" id="Description" name="Description" required>
                    </div>

                    <div class="form-group">
                        <label for="Image">@L("Image")</label>
                        <input class="form-control" type="file" id="Image" name="Image" required>
                    </div>
                    <button type="submit" id="btn-upload" class="btn btn-light-primary font-weight-bold close-button">@L("Upload")</button>
                </form>
            </div>
        </div>
    </div>
</div>
  • Then you will have same file upload page.

file-upload-tutorial-page-result

After you fill the description area, select a file and click to upload, you will see that it does not the page. With ajax based file upload you can upload file without refreshing page.

In this document