
Step By Step Publish To IIS
Host Application Publishing
Publishing ASP.NET Zero Host project is no different to any other ASP.NET Core Application.
Publishing Web Site
- Right click
\*.Web.Hostproject and click Publish. - Click Start and select Folder tab and choose the URL that you want to publish.
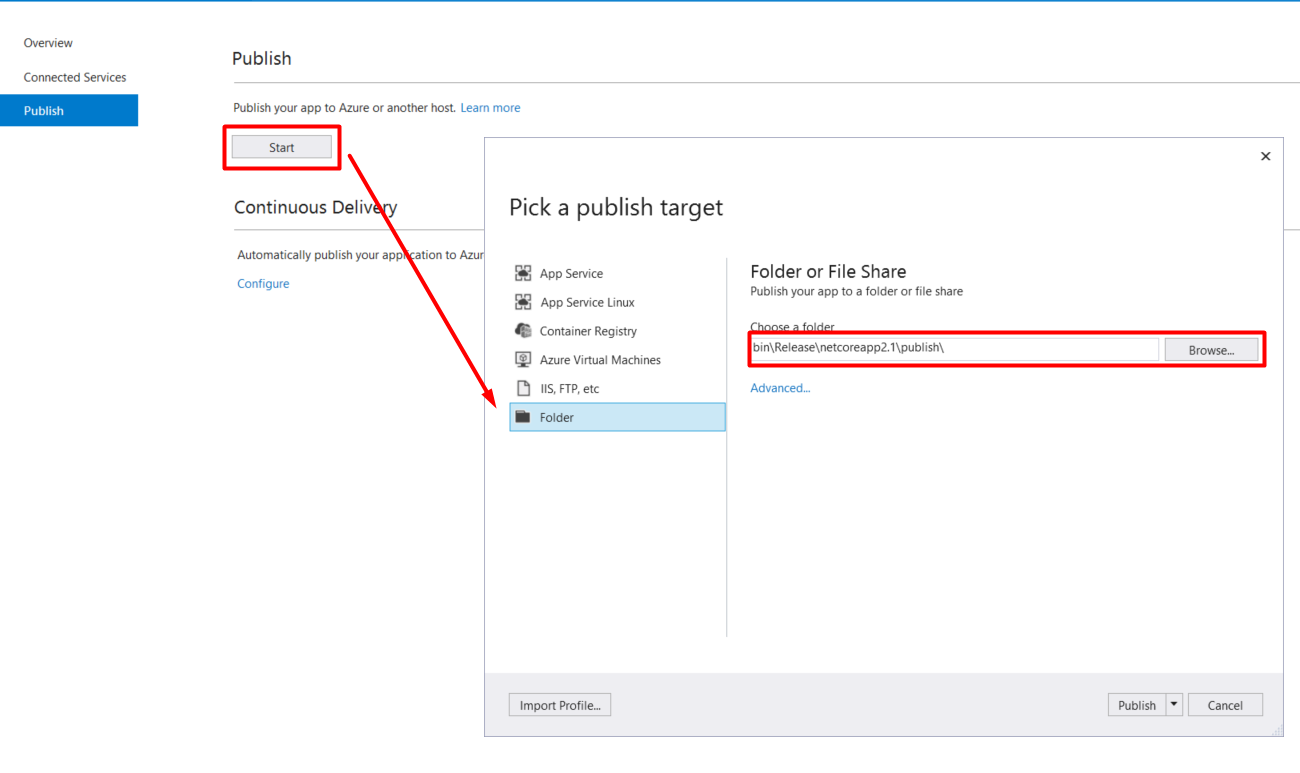
- Create a folder on the server where IIS is located. (for example:
C:\inetpub\wwwroot\mywebsite). - Copy published files to server. (from
*.Web.Host/bin/Release/net8.0/publish/toC:\inetpub\wwwroot\mywebsite). - Change
appsettings.production.jsonconfigurations with your own settings.
Create IIS Web Site
- Right click Sites and click Add Website.
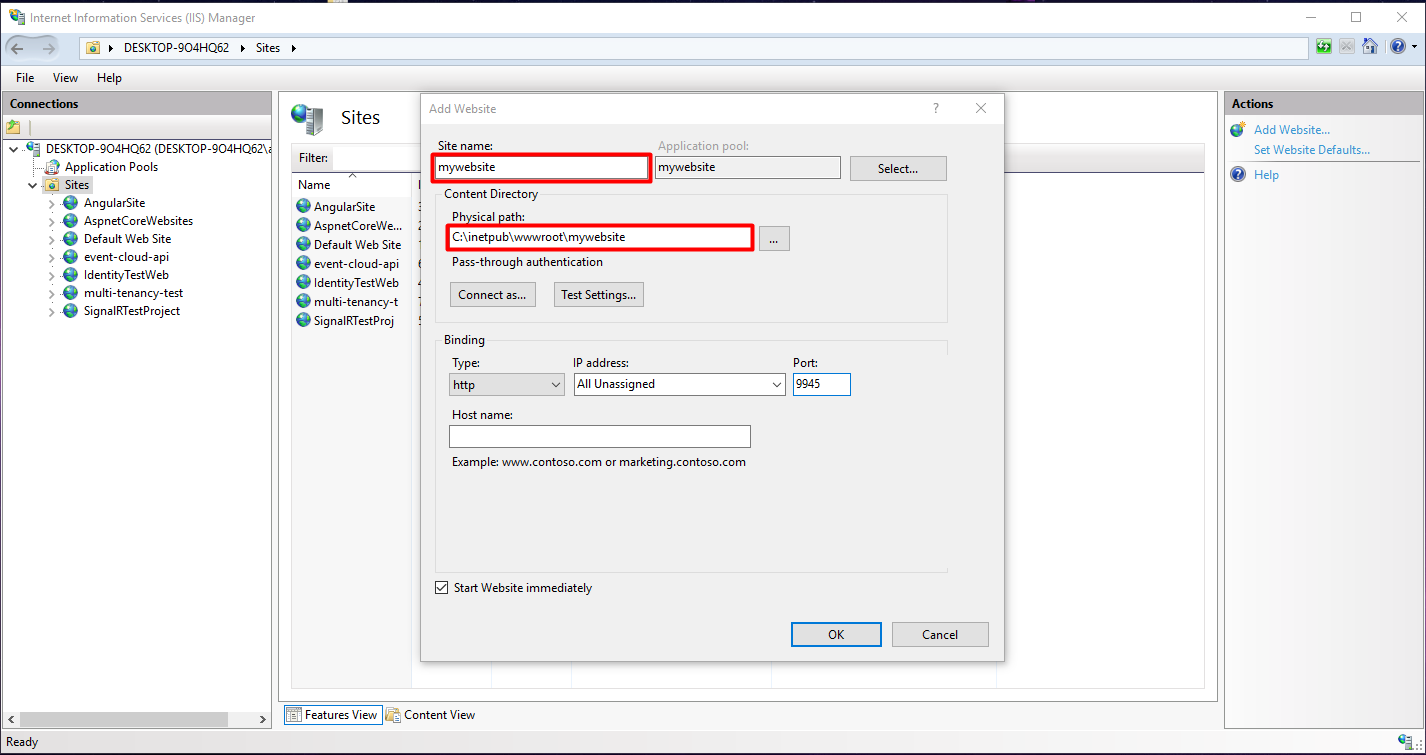
- mywebsite application pool will be created automatically. Click Application Pools, double click mywebsite application pool and change its configuration.
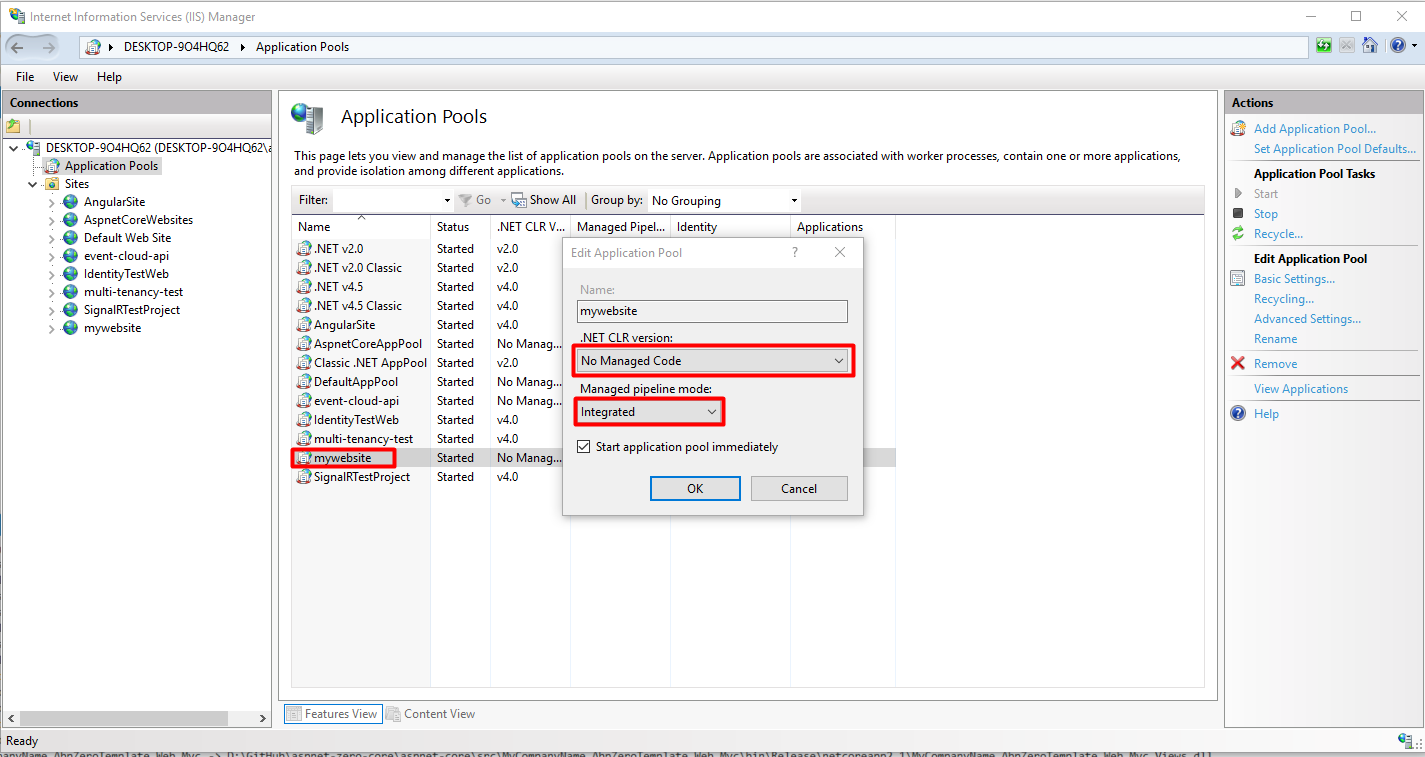
The project contains a web.config file, its contents may be changed during development, please check the web.config file after publishing, especially the ASPNETCORE_ENVIRONMENT setting.
Check Host ASP.NET Core on Windows with IIS document for more detail.
React Application Publishing
The React application is built using Vite and can be deployed as static files to IIS:
Build the Application
- Configure production settings by creating or updating
.env.productionin the project root:
VITE_API_BASE_URL=https://your-host-api-url
Run
pnpm buildornpm run build. This command outputs the production build to thedistfolder.Copy all files from the
distfolder to your IIS website directory (for example:C:\inetpub\wwwroot\reactwebsite).
Configure IIS for SPA Routing
Important: React uses client-side routing. If you refresh a page (F5), IIS will handle the request and will not find the requested path, returning an HTTP 404 error. You must configure IIS to redirect all requests to the index.html page.
Prerequisites: Install the URL Rewrite module for IIS.
Create a web.config file in the website's root folder with the following content:
<?xml version="1.0" encoding="utf-8"?>
<configuration>
  <system.webServer>
    <rewrite>
      <rules>
        <rule name="React Routes" stopProcessing="true">
          <match url=".*" />
          <conditions logicalGrouping="MatchAll">
            <add input="{REQUEST_FILENAME}" matchType="IsFile" negate="true" />
            <add input="{REQUEST_FILENAME}" matchType="IsDirectory" negate="true" />
          </conditions>
          <action type="Rewrite" url="/index.html" />
        </rule>
      </rules>
    </rewrite>
    <staticContent>
      <remove fileExtension=".json" />
      <remove fileExtension=".woff" />
      <remove fileExtension=".woff2" />
      <mimeMap fileExtension=".json" mimeType="application/json" />
      <mimeMap fileExtension=".woff" mimeType="application/font-woff" />
      <mimeMap fileExtension=".woff2" mimeType="application/font-woff2" />
    </staticContent>
  </system.webServer>
</configuration>
If the React app is hosted on Windows/IIS, these font MIME type mappings are required so .woff and .woff2 files can be served correctly. Without them, icons and custom fonts may not appear in the UI.
Create IIS Web Site for React
- Right click Sites and click Add Website
- Set the physical path to your React build folder (e.g.,
C:\inetpub\wwwroot\reactwebsite) - Configure the site name and port
- Ensure the application pool is set to No Managed Code since React is a static site